.jpg&w=3840&q=75)
KitchenAid Semi Automatic Espresso Machine Review
Straightforward setup, good looks, and strong performance that's accessible to beginners make the Kitchenaid KES6551 a worthy opponent to the Breville Barista Express.
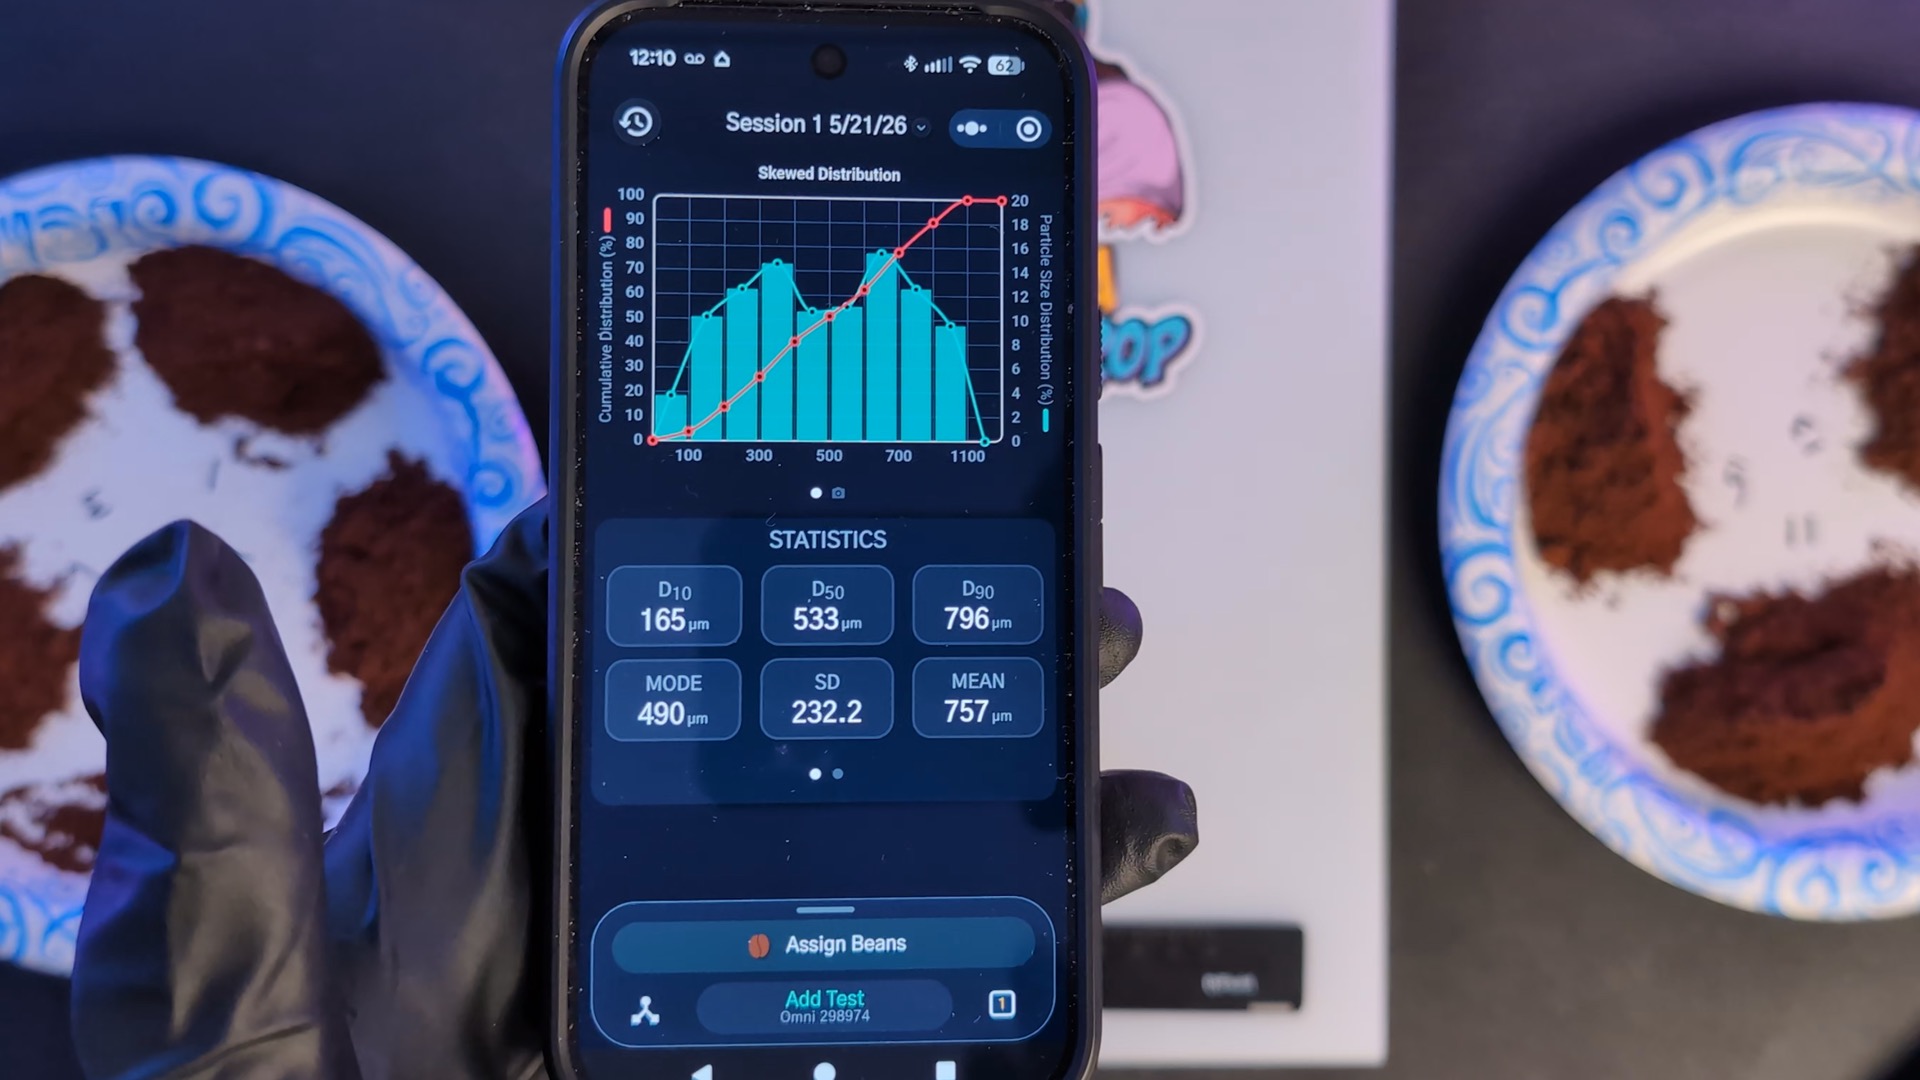
Grind data is captured via DiFluid Omni NIR analysis. I plot the particle distribution across 16+ settings to identify the 'Optimal Zone' for each brew method. Actual results vary based on roast type and freshness, among others; however, it remains a starting point for dialing in.
This site is 100% ad-free and always will be. This particular review was conducted on a factory-new, calibrated unit, and was not sponsored. I purchased this unit for testing purposes. Purchases made through our links may earn a commission, supporting the testing and data acquisition.
Full Review
Intro
Known more for their iconic stand mixer than their espresso equipment, KitchenAid’s SKES6551 is a semi-automatic espresso machine with an integrated grinder.
If your kitchen is already full of KitchenAid appliances, then the KES6551 will slot in nicely alongside its countertop counterparts. If you’re in the market for a new machine regardless of the brand, then it’s a two-horse race at this price. Priced at $699, the KES6551 is positioned as a direct competitor to the widely-beloved Breville Barista Express, both in terms of price (the Barista Express is also $699) and functionality.
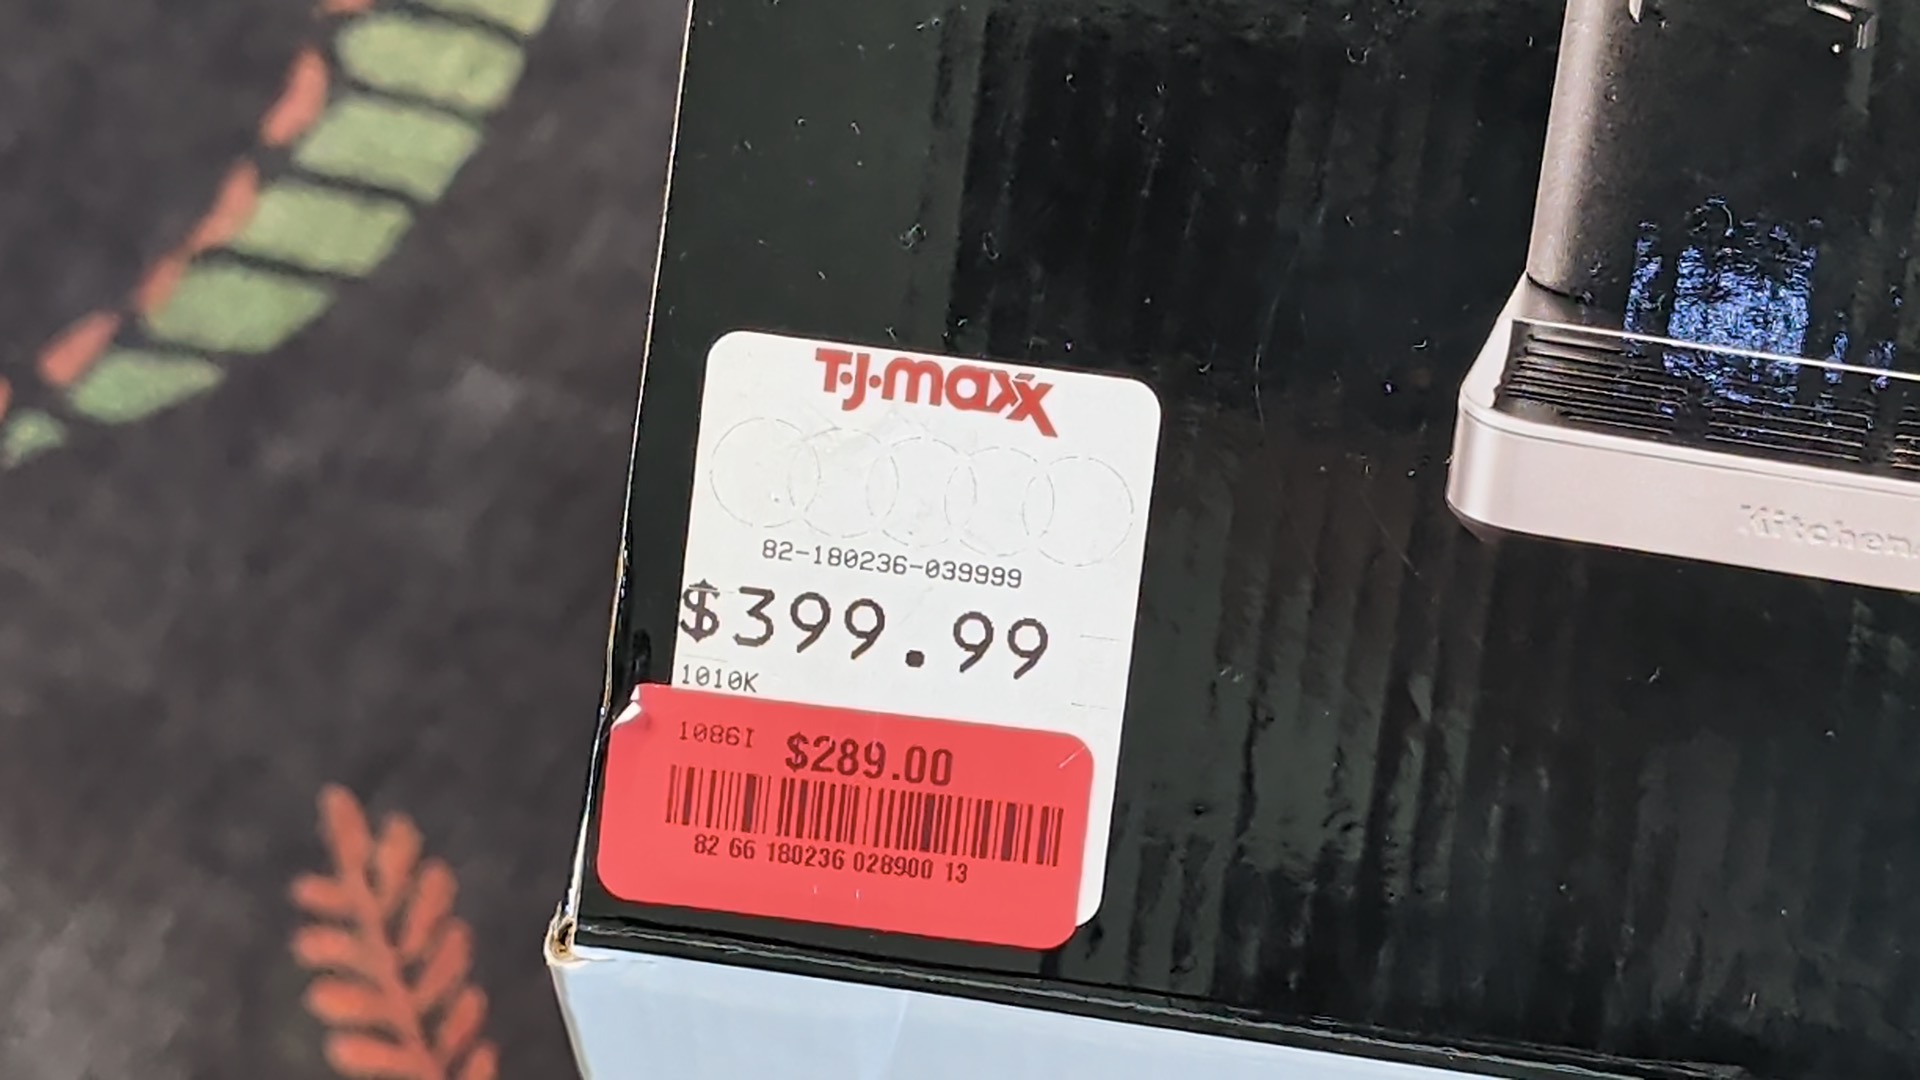
I was able to find mine at TJ Maxx at a clearance price of $289 down from an already-low $399, so for me this ended up a complete bargain, but if you’re not able to find one of these or a Barista Express at a half its regular sales price, then let’s take a closer look and see if the KES6551 is worth its price tag.
Unboxing
Unsurprisingly, as an integrated machine the KES6551 comes in a pretty hulking box. Getting it set up and running makes for a straightforward experience regardless of whether you’ve ever made espresso at home before, thanks to the included guides and accessories (like the four portafilter baskets that the KES6551 ships with).
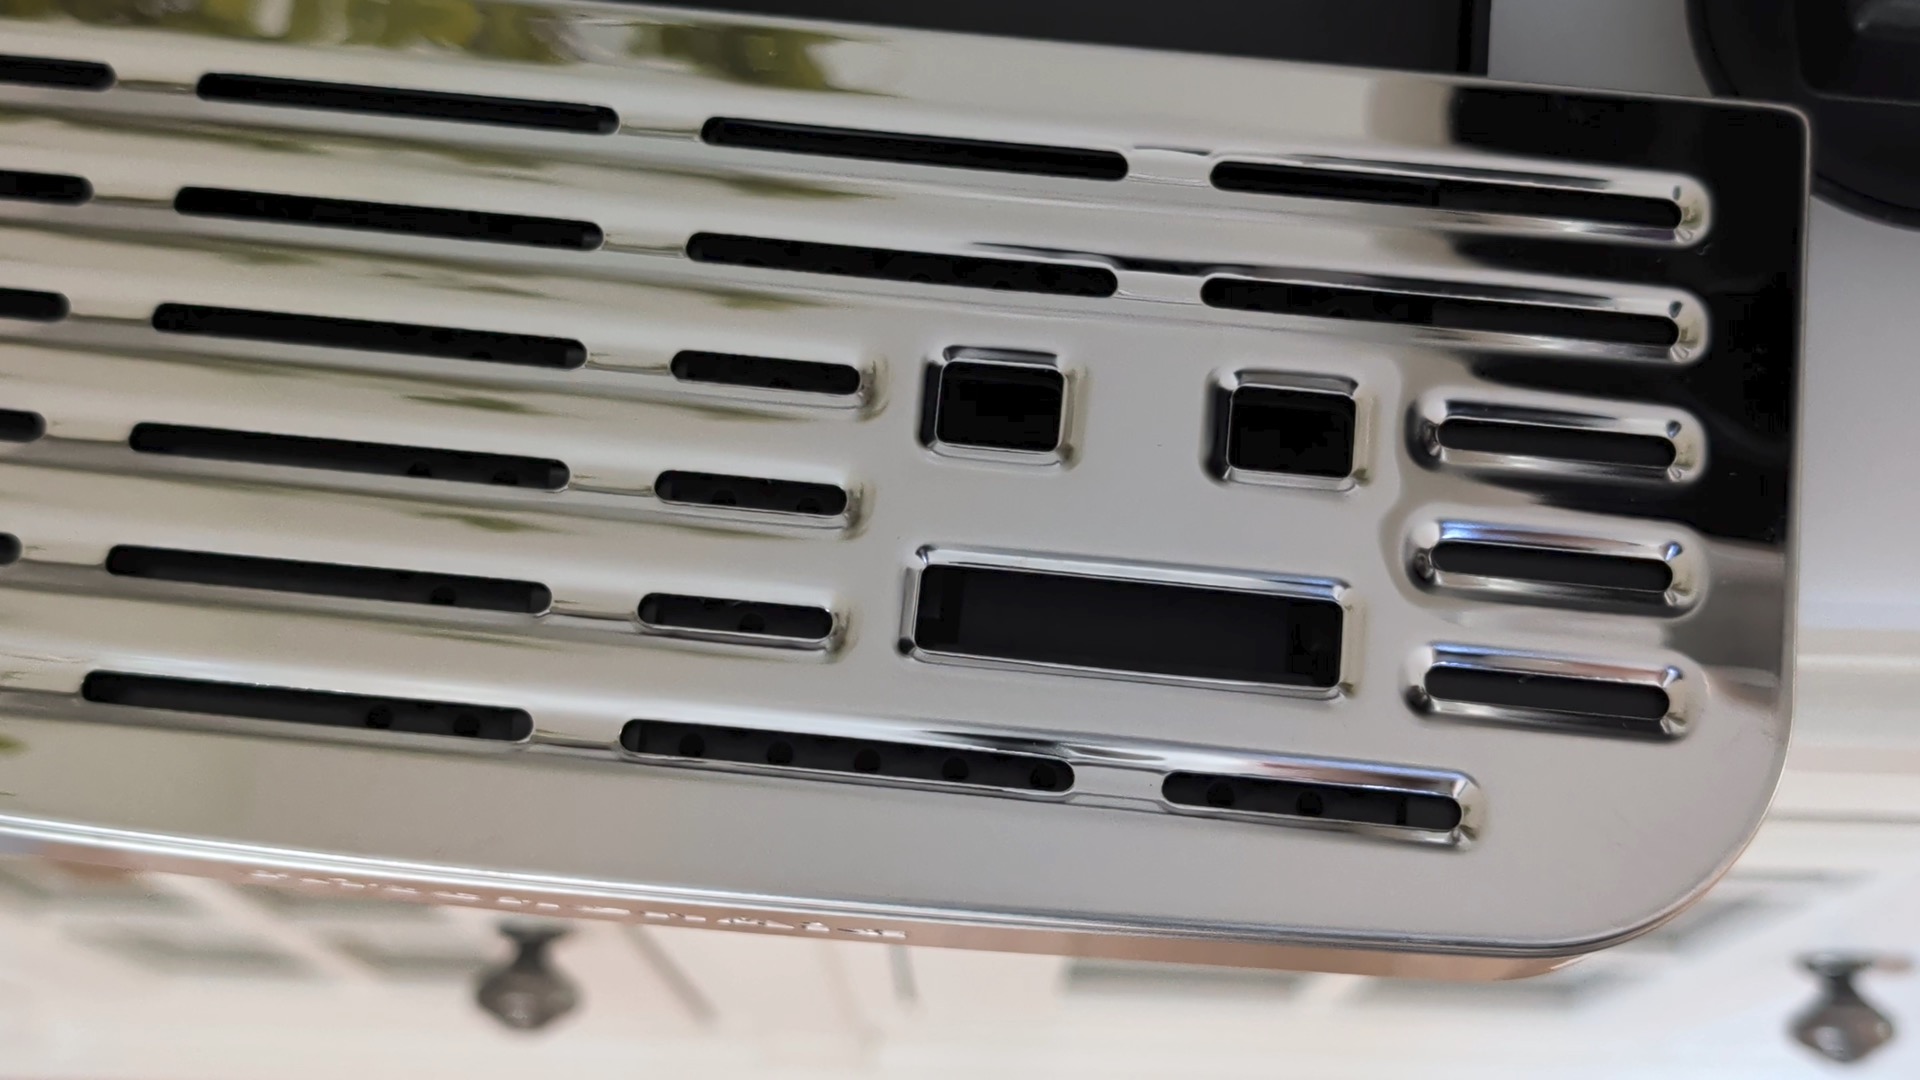
The quick-start guide that you’re greeted with on the top panel inside the box comes with a QR code that links through to some useful setup videos. Under that, there’s a water filter holder and water filter, and a separate box containing the portafilter, tamper, and primer pump. Once that’s open, we’re through to the main machine and the frothing pitcher. There’s a clever little storage area behind the drip tray where three portafilter baskets and a cleaning brush are stowed away.
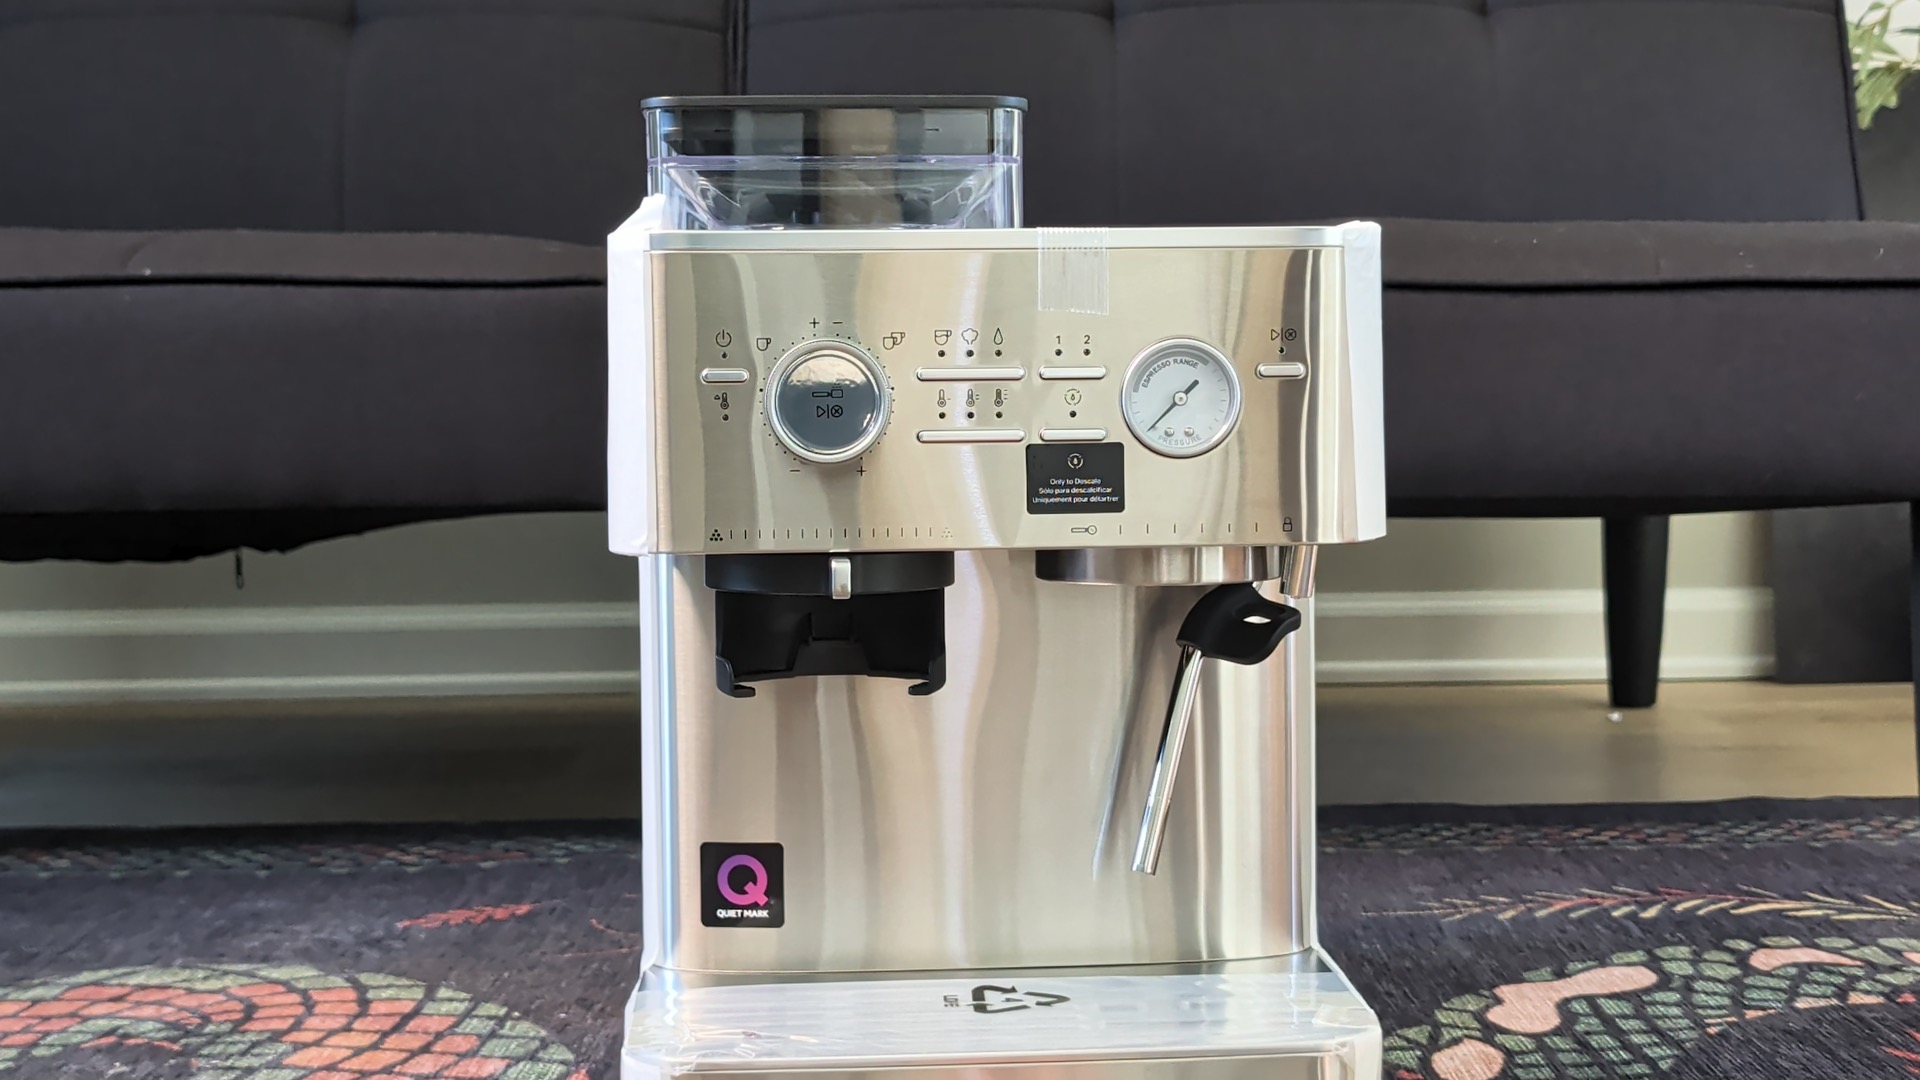
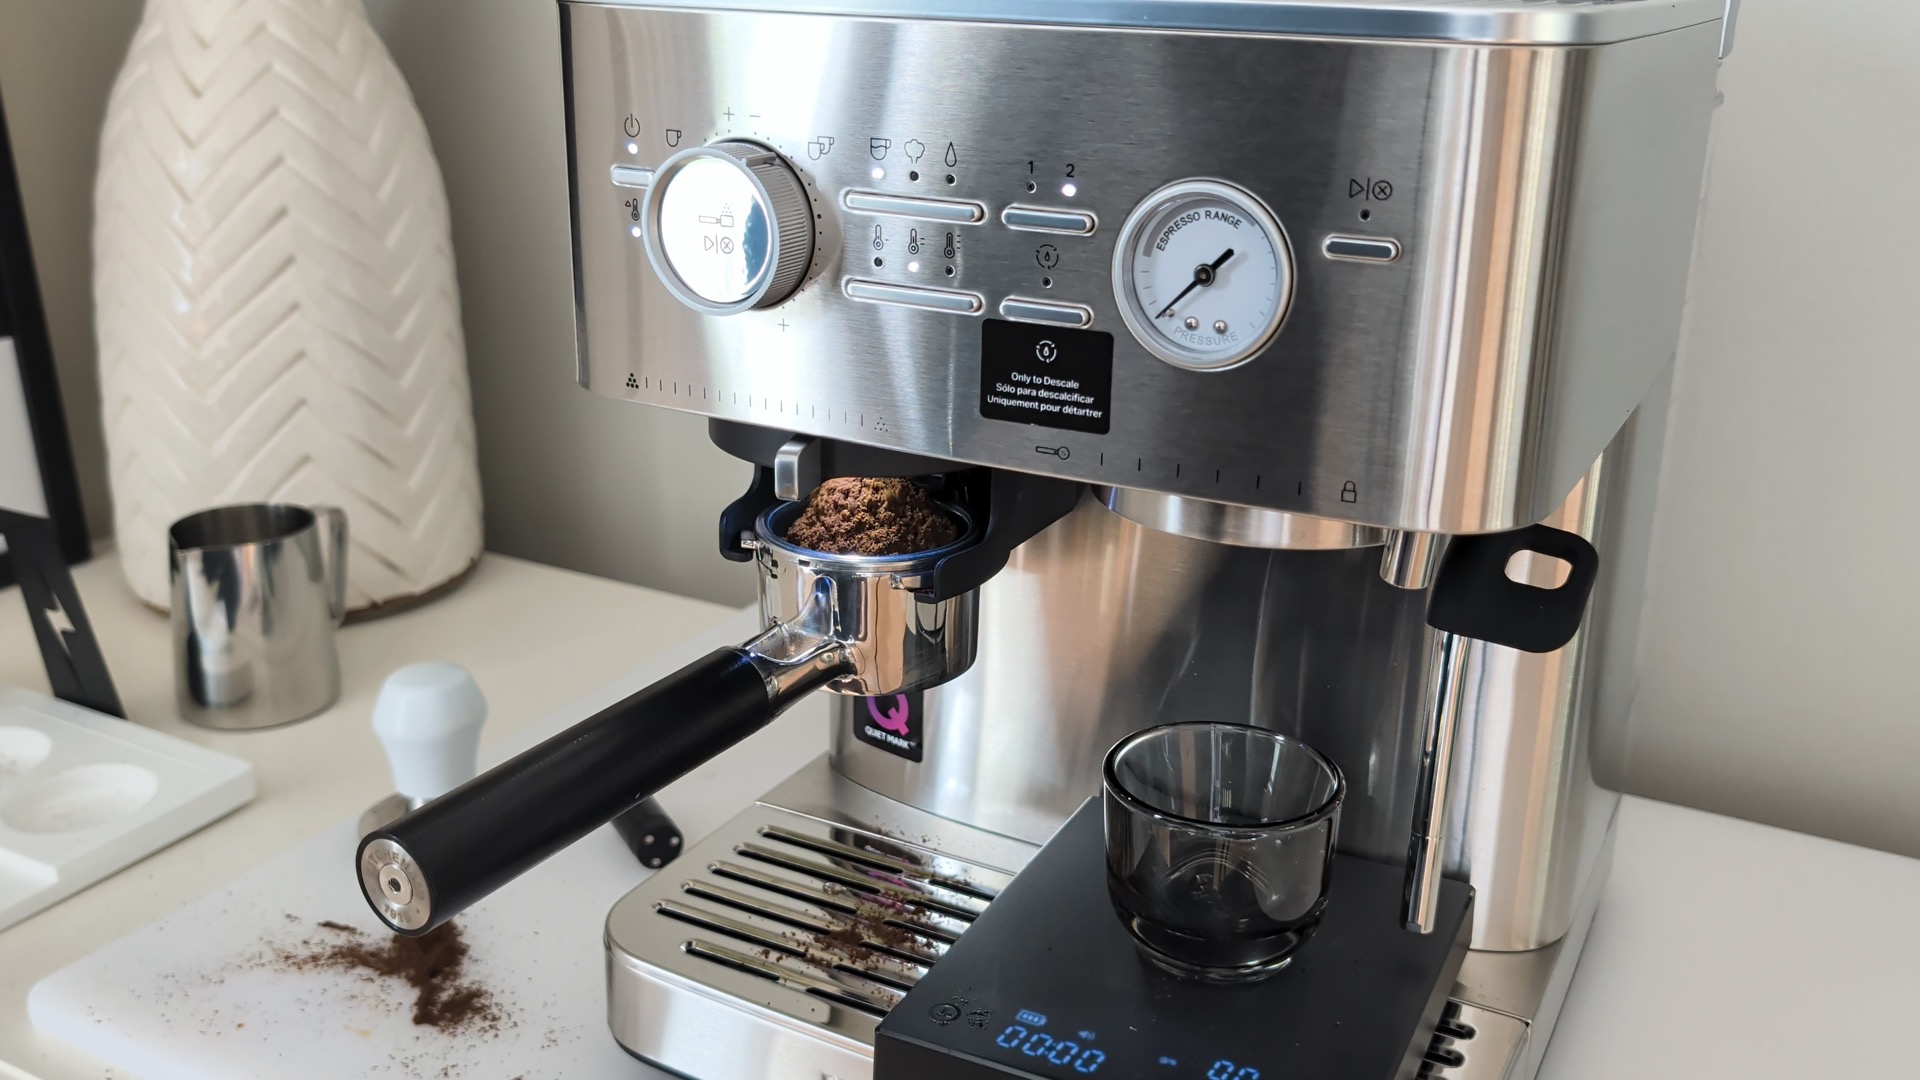
Like all KitchenAid products, it’s a good looking machine, and once the various bits of film and packing tape are pulled off, it’s hard to imagine anyone feeling buyers’ remorse on an aesthetic level once it’s on the kitchen counter. The main body has a brushed metal finish, and at first glance it’s a durable and elegant looking appliance. At 23 lbs, it both feels and looks solid.
After the obligatory rinse of the portafilter, milk jug, and bean hopper in soapy water, priming the machine with a small amount of water using the priming plunger, and soaking the water filter for 5 minutes, you can pull your first shot within about 20 minutes of opening the box.
Design
Let’s start with the good, and there is a lot of good. The KES6551 has a few thoughtful touches that add genuine value.
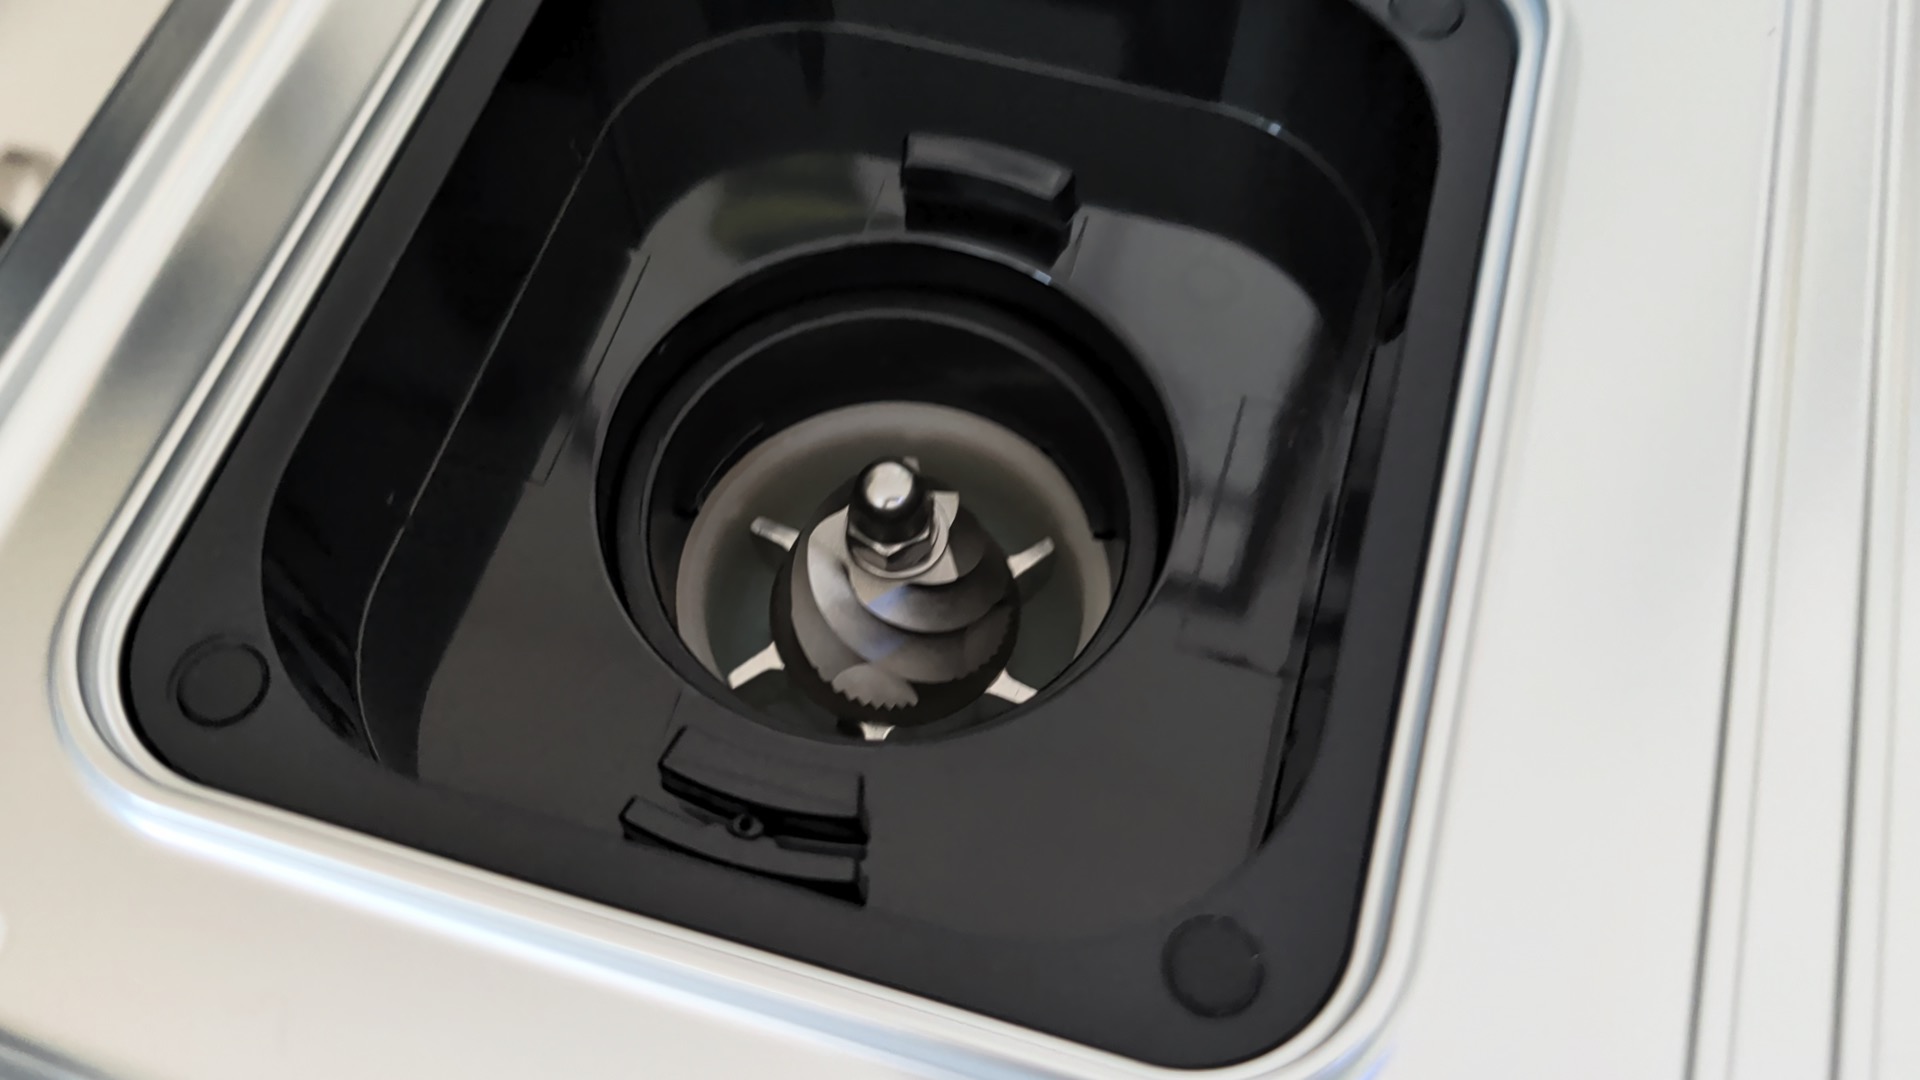
The hopper comes off easily, with clear access to the burrs below which makes it very easy to switch between two different bags of beans, or regular and decaf without having to deal with the chore of coaxing out leftover beans.
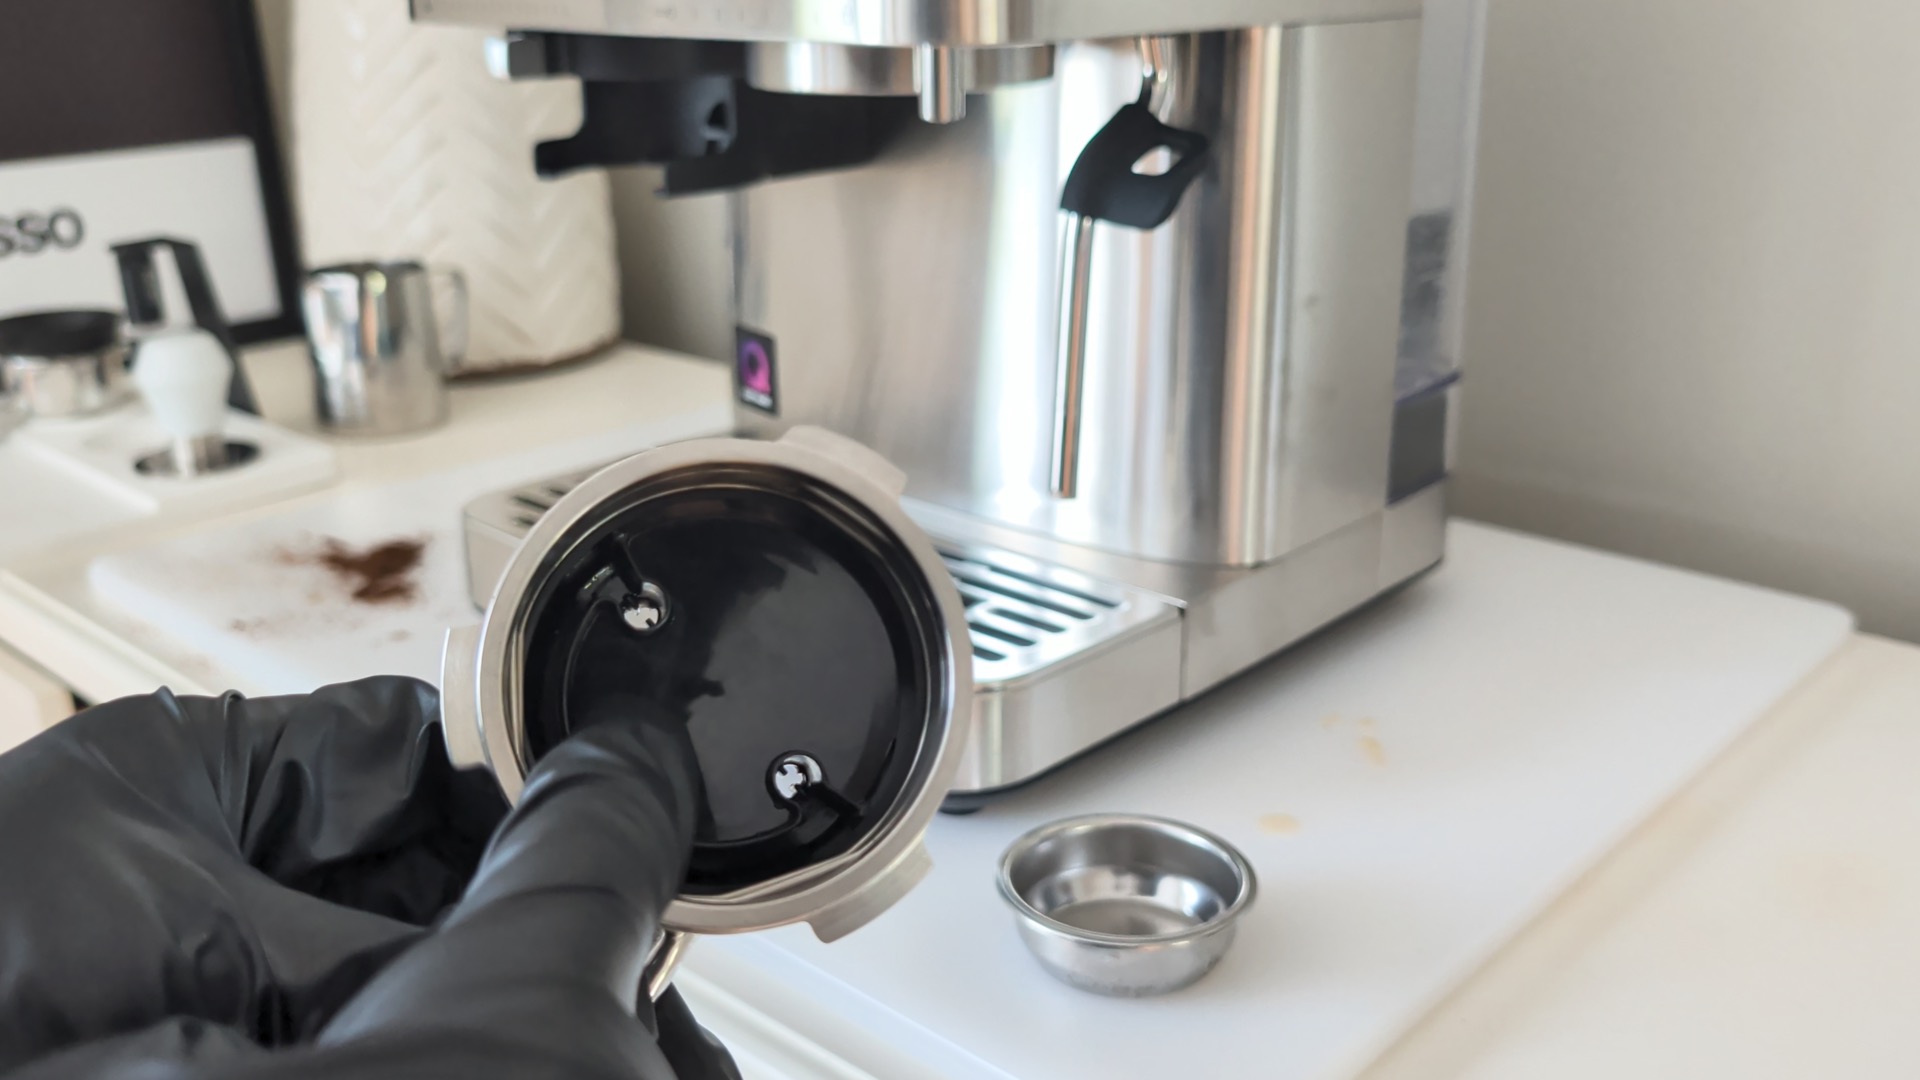
While most people won’t have need for all four included portafilter baskets, the storage area behind the drip tray will save your cupboards from having never-used baskets kicking around for eternity. Giving users the option of double-walled and single-walled versions of each basket is also a great way to help beginners work their way up through the process of getting particular about grind setting and dialing in. However, this machine didn’t have a problem reaching proper pressure levels (more on this in the performance section), so I strongly recommend learning how to use the single wall.
An always-welcome design element: a hidden face
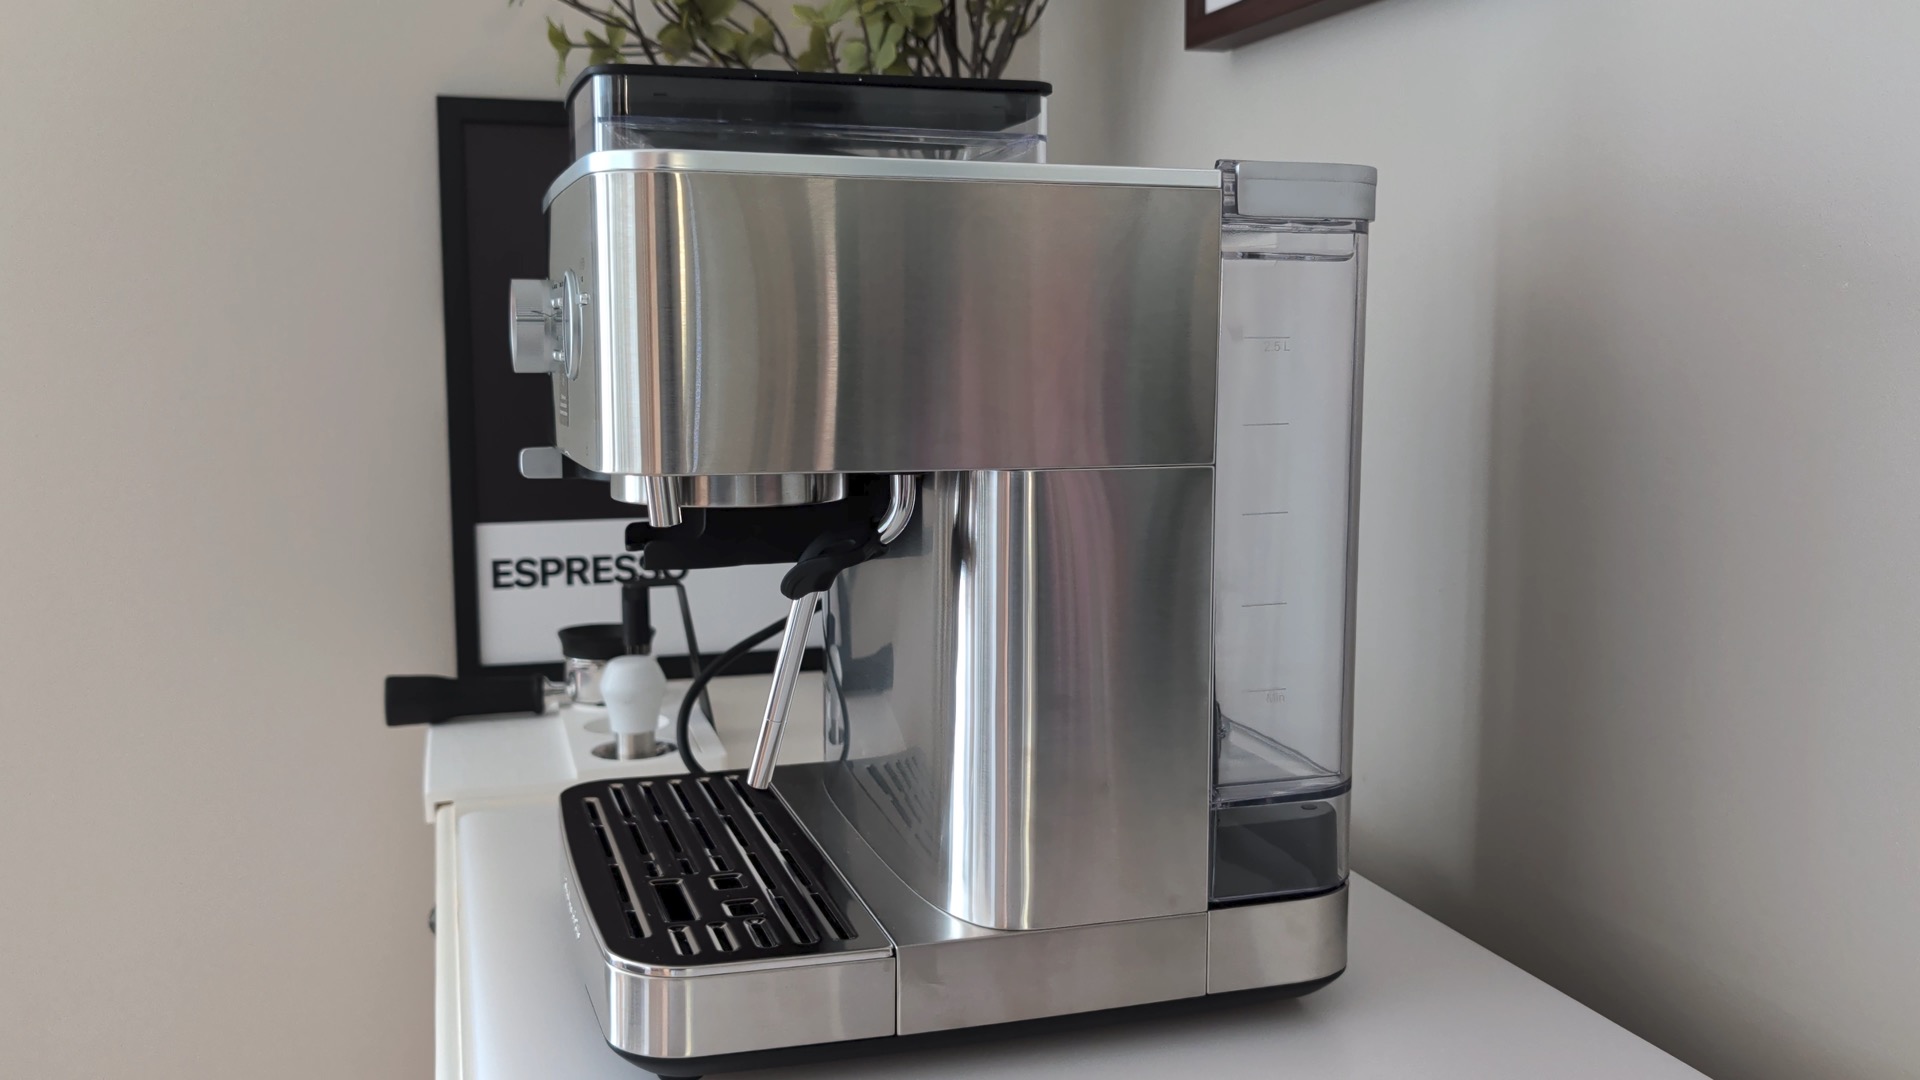
The 0.67 gallon/2.5 litre water tank offers plenty of capacity, and the metal handle is a great touch. The wheels on the back of the unit mean that wheeling out the KES6551 to refill the tank if it’s tucked into a corner is about as easy as it gets with a tank of this size.

The included 58mm portafilter is designed to sit flat on a surface so tamping is easy without the added clutter of a tamping mat. But the blasted thing is filled with plastic. I was so close to being thrilled with this portafilter between the flat design and the weight to it. It doesn’t appear to be removable but I might try to force it in the near future.
Now for the areas for improvement, none of which are deal-breakers. Though it’s not cheap, the KitchenAid is still in the lower-mid-range of espresso machines, so there’s inevitably going to be some plastic on the body. That being said, it’s hard not to wish that the cup warmer on the top, and the portafilter holder under the grinder were made of metal or sturdier-feeling plastic.
All the buttons on this are intuitive, and the pressure gauge is great to have, but it would be even better if KitchenAid had gone one step further and added numbers to the gauge. As it is, the needle hovers in the “espresso range” if you’re getting enough pressure during brewing, but knowing the exact number of bars requires guesswork. The “espresso range” is quite a big range, so after a bit of research 9 bars is around 12 o’clock.
Features
- Choice of 5 colors (stainless steel, white, juniper, black, and red)
- Integrated burr grinder with 15 settings (plus an additional 8 internal microadjustments)
- 4 included baskets: 2 single-wall (single and double shot) and 2 double-wall (single and double shot)
- 58mm flat-base portafilter
- Multi-angle single-hole steam wand
- Programmable “smart dose” volume settings
- Easily-removable hopper
- Thermocoil single boiler
- 11” depth x 13-3/32” width x 15-13/32” height
Performance
Grinding
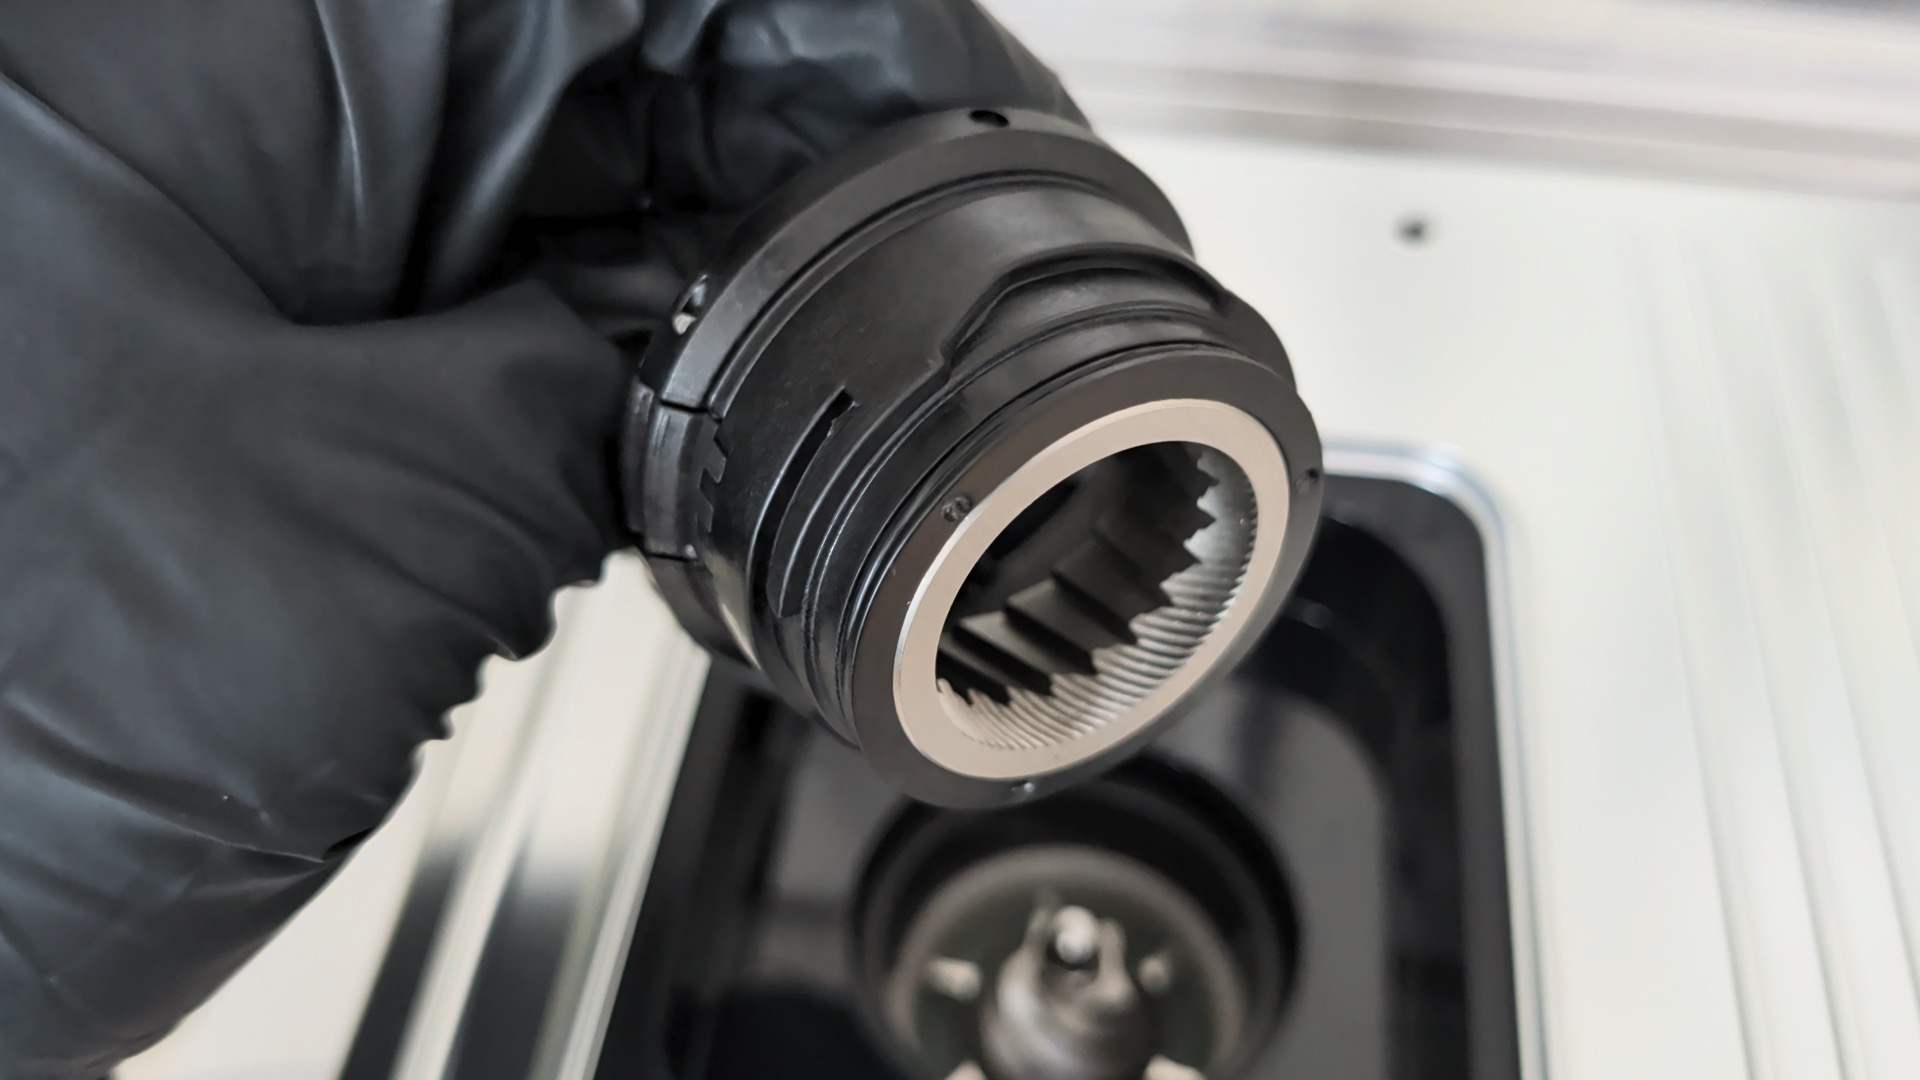
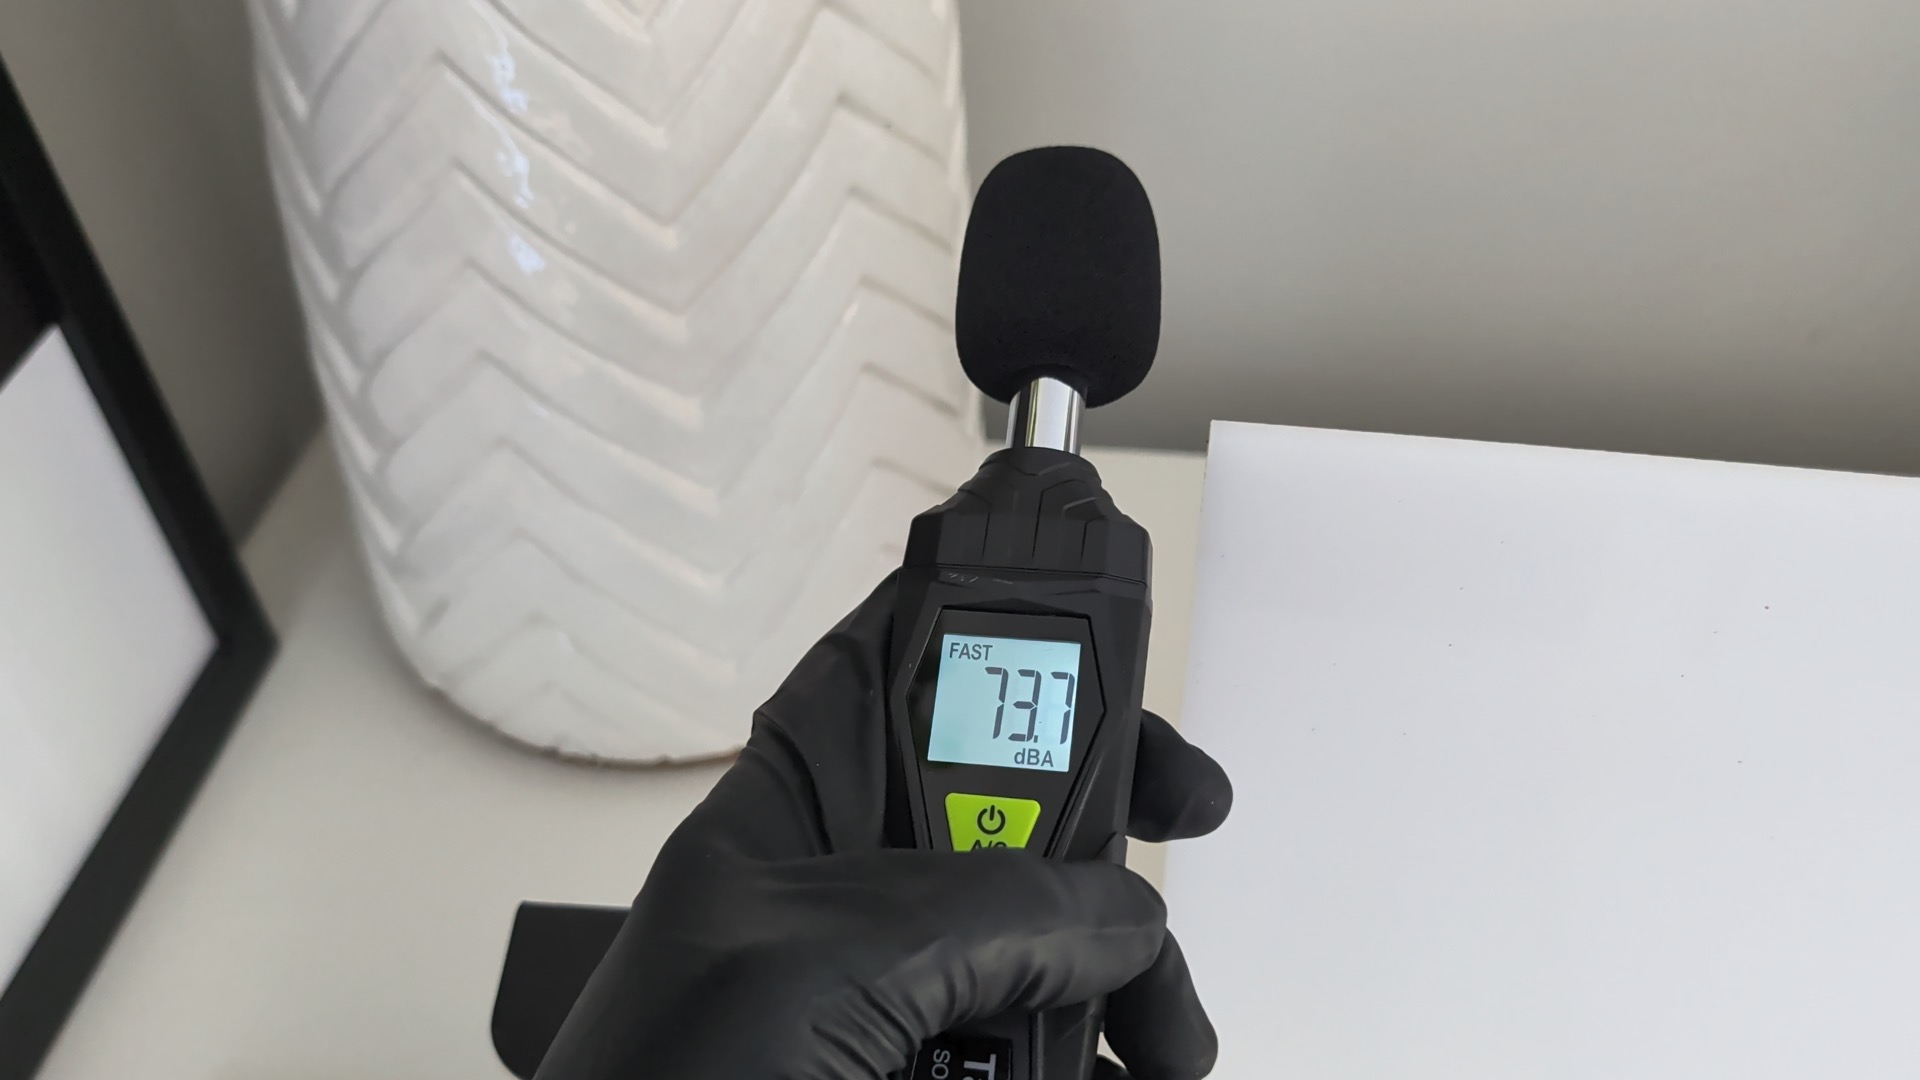
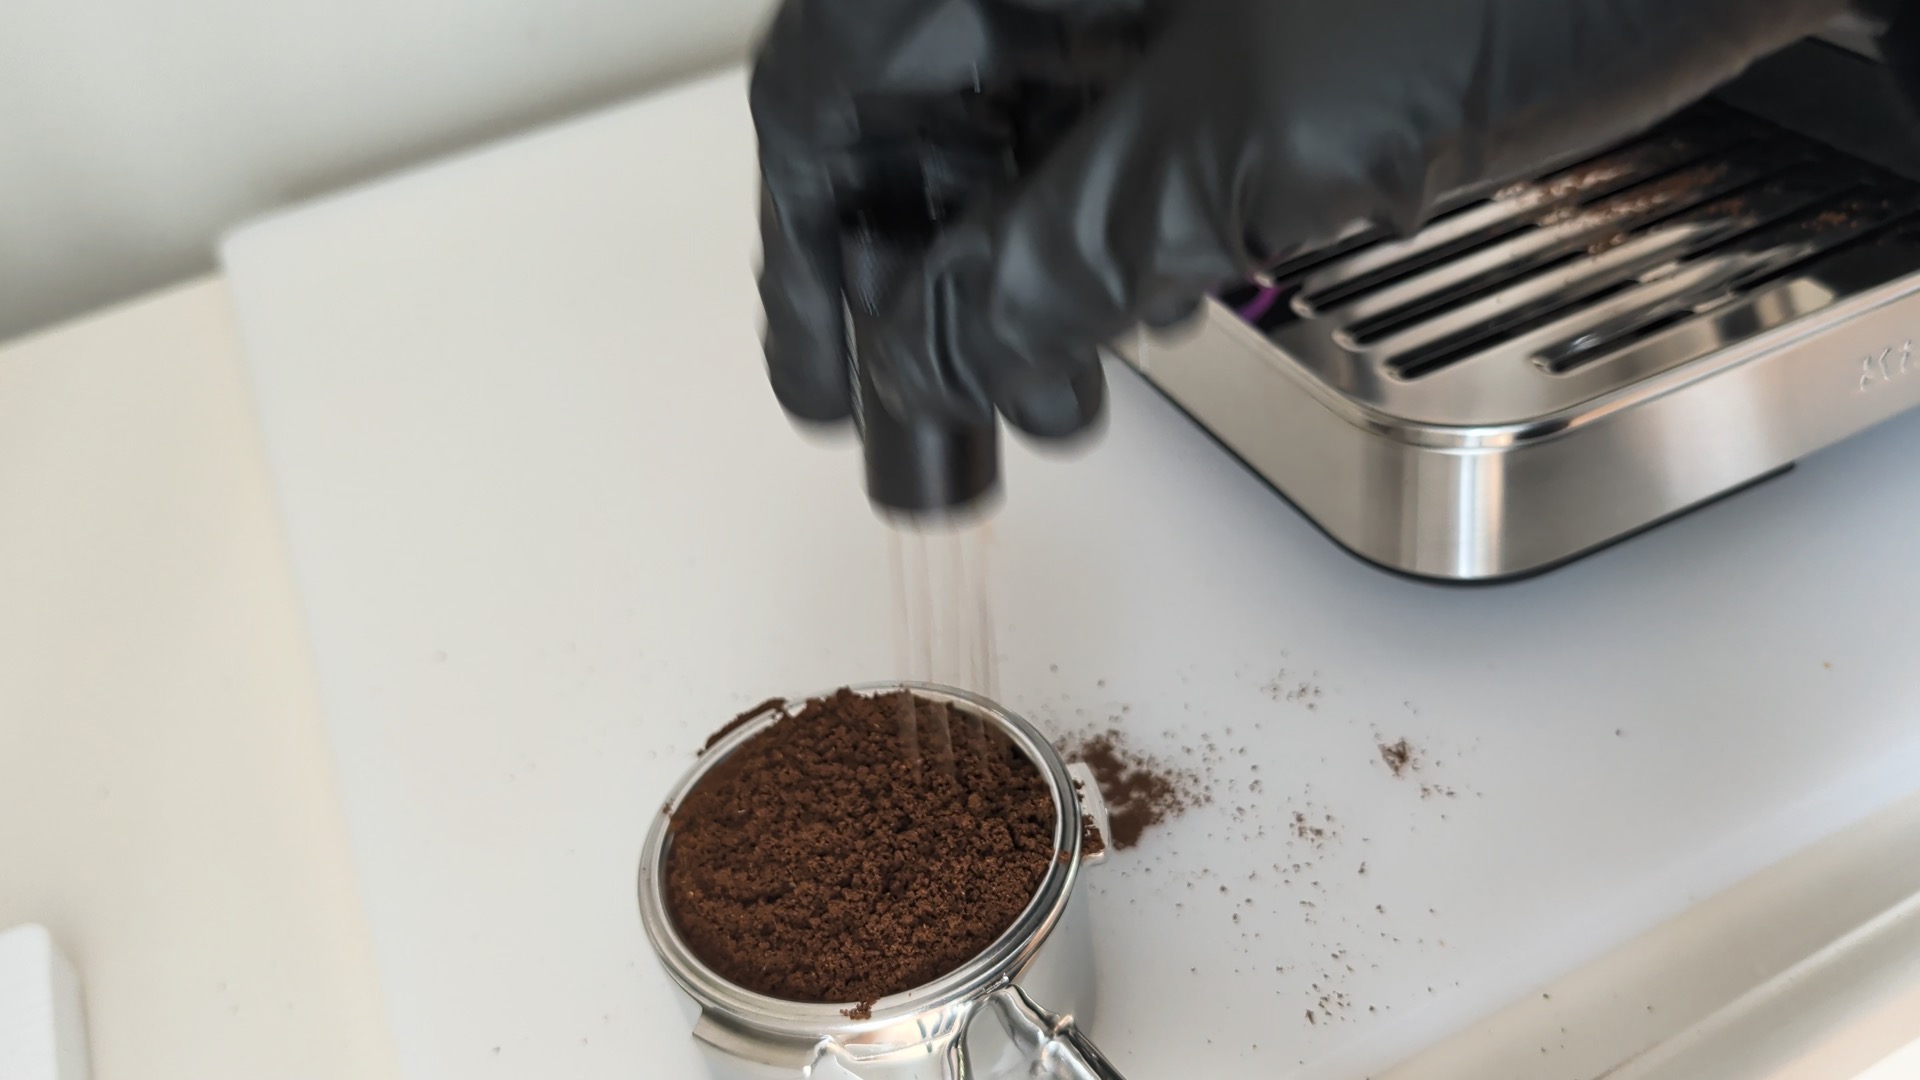
Integrated 30mm stainless steel conical burrs are easy to remove for cleaning, and it’s also super quiet. A max of 75.9 dB but with a more common 73.5 dB average.
It wouldn’t be a benchmark test without a full particle analysis of each grind setting. Using Coffee Bros medium espresso roast beans, I collected grinds from Settings 1, 3, 5, 7, 9, 11, 13, and 15. I fired up the DiFluid Omni and performed 5 particle analysis tests at each of these grind settings for a total of 40 tests. Here’s the results.
I’m surprised by the built-in grinder on this machine. Very similar coefficient of variation percentages as $200 grinders like the Baratza Encore ESP and Fellow Opus, and I have yet to experience an issue with clogging (their marketing materials mention an integrated ion generator to reduce static clumping). Looking at the spectrum curves, the grinder holds a solid consistency spread between settings with the biggest variability at the finest settings. Then again, this is common since particle analysis becomes more difficult with ultra fines.

Brewing
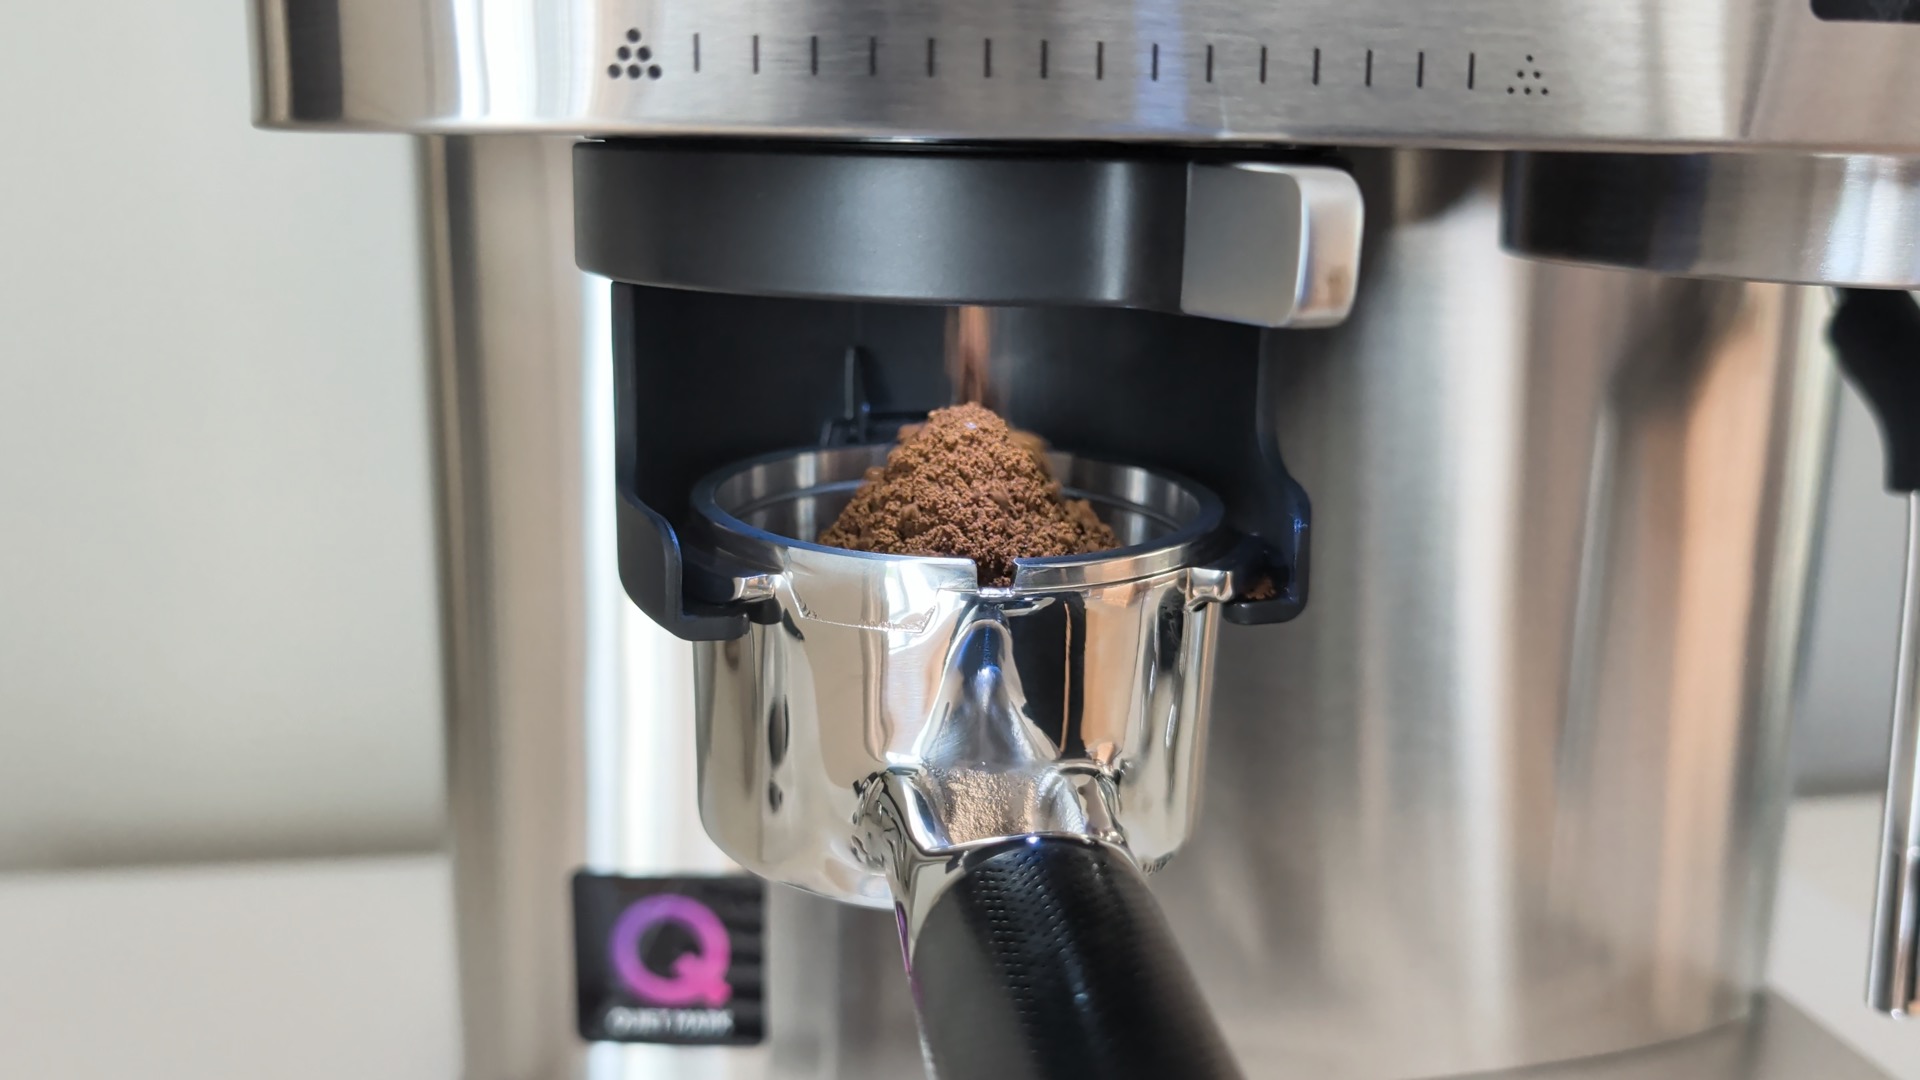
Alright, now let’s get to dialing in a double shot. For my first attempt, I used the default (or middle) grind and dose settings to see what happens. I noticed right away the dose seemed large. Combine that with me mistakenly using a double wall basket, pressure nearly maxed out and barely anything came out. This is because double wall baskets are intended to artificially increase pressure by forcing the liquid out a single pinpoint hole. This can be beneficial for equipment that can’t grind fine enough.
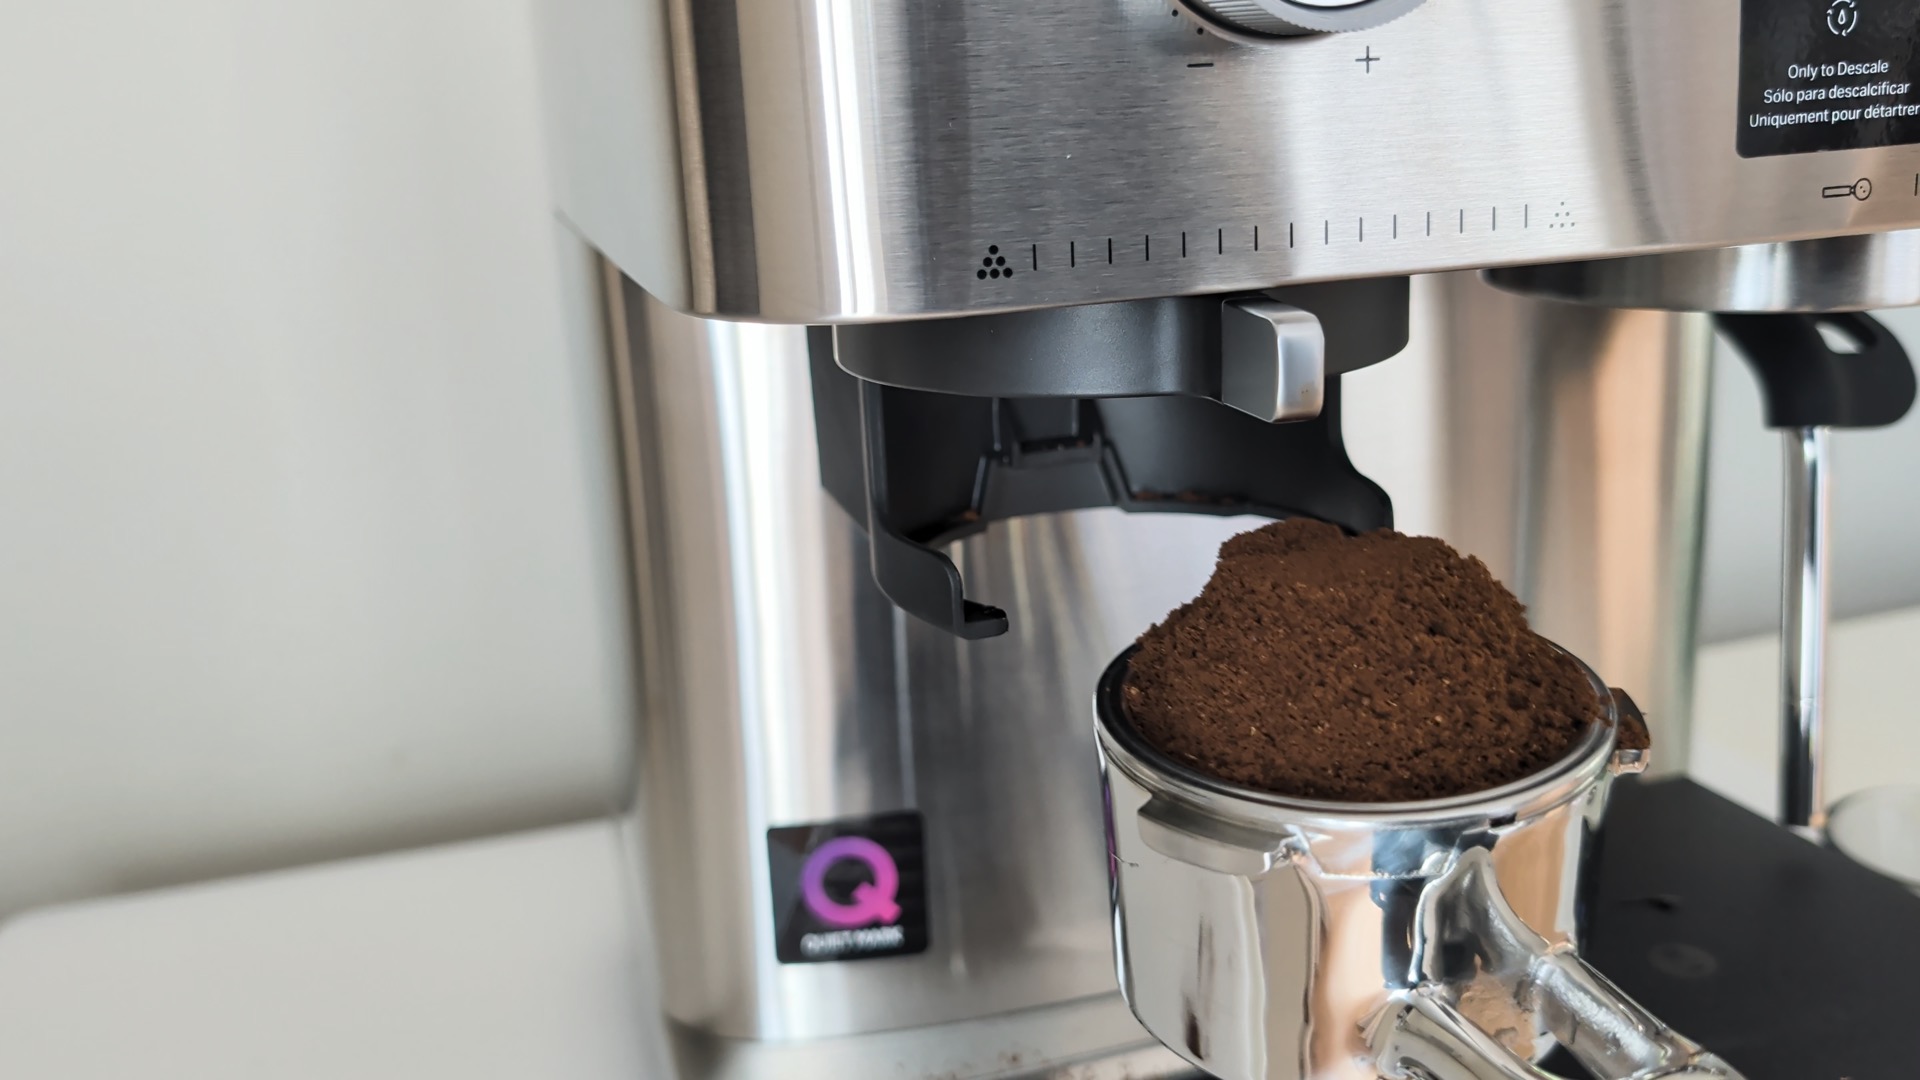
I grabbed the single wall and tossed the double wall in the trash so I never make that mistake again. With the correct basket and slightly reducing the dose, I pulled another shot which seemed to do well at pre-infusion and immediately after, but then quickly came out too fast. We need to grind finer.
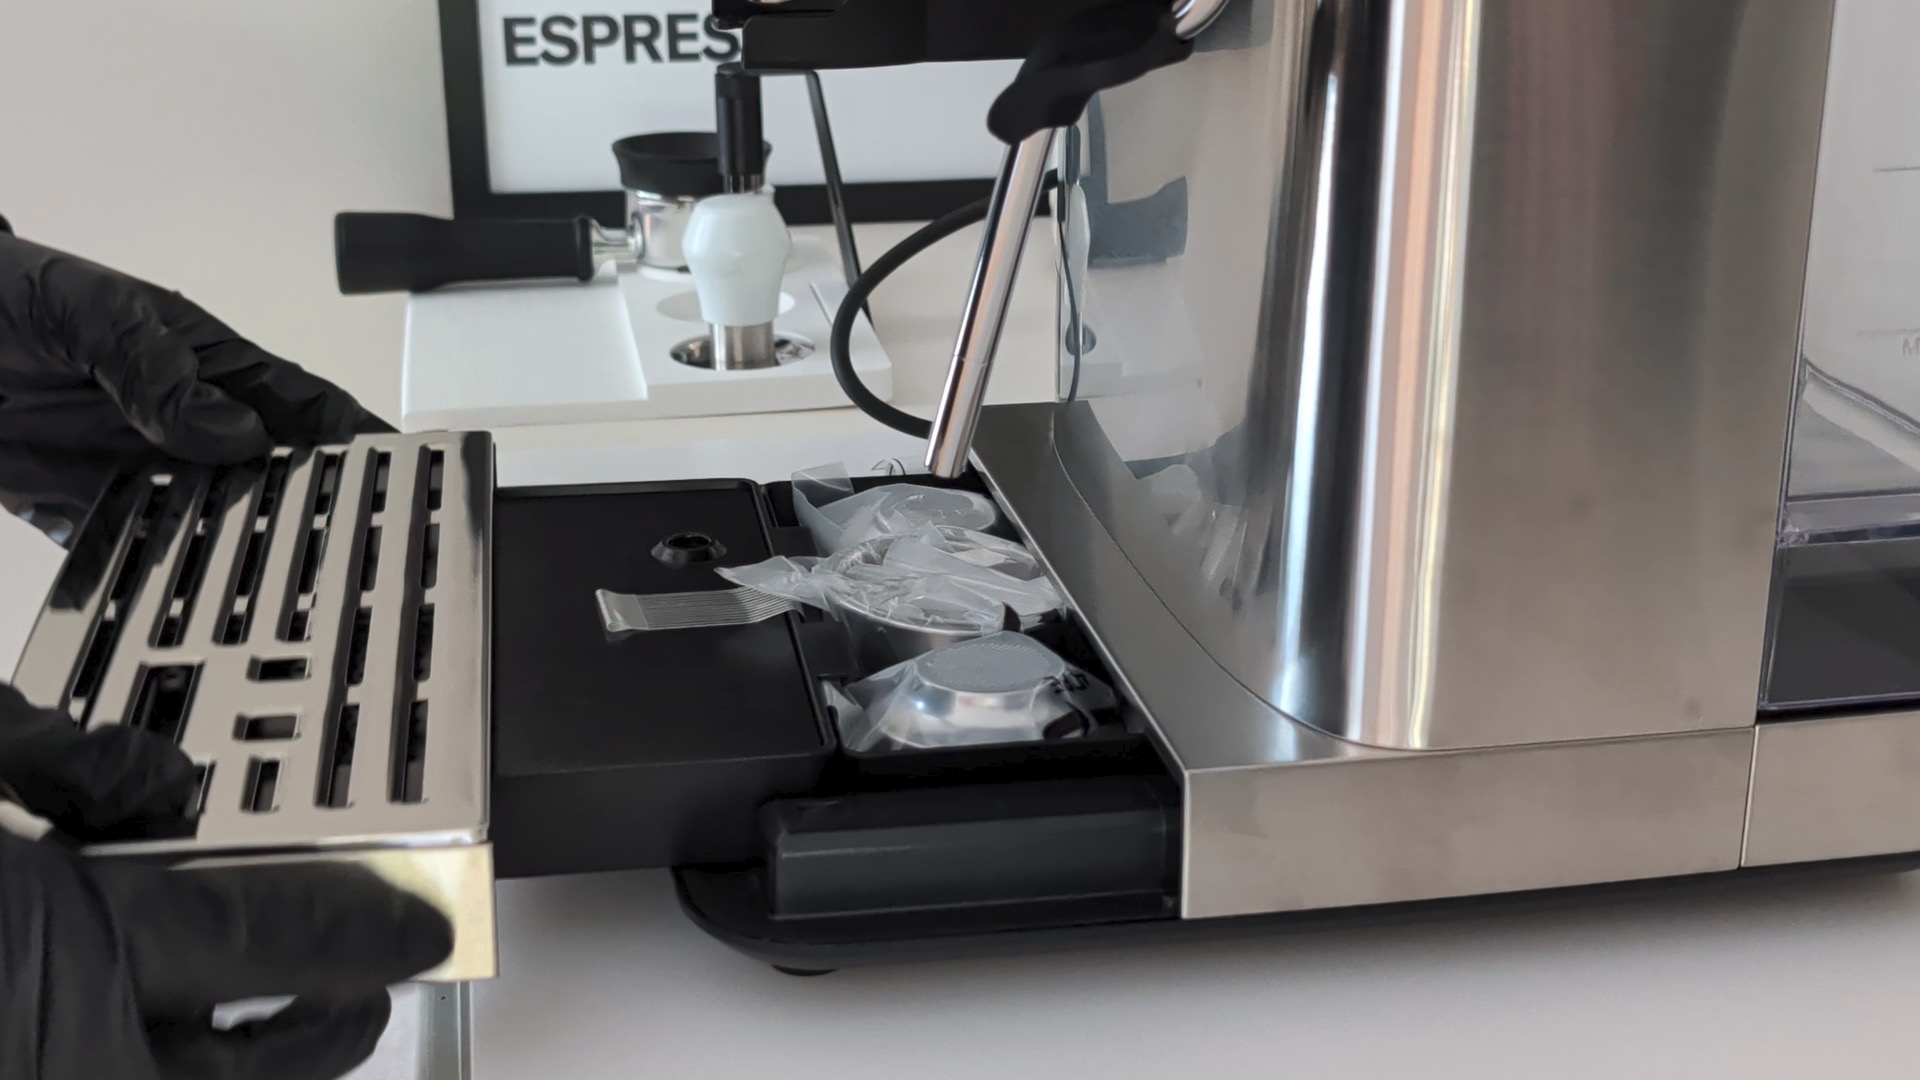
On just my third attempt, I had it about 95% dialed in using the 11th grind setting from the left, and reducing the grind dose to the 3rd tick. Being things are not numbered on this machine, it may be tough to explain what I’m talking about so here’s a photo of the settings that worked for my particular medium roast.
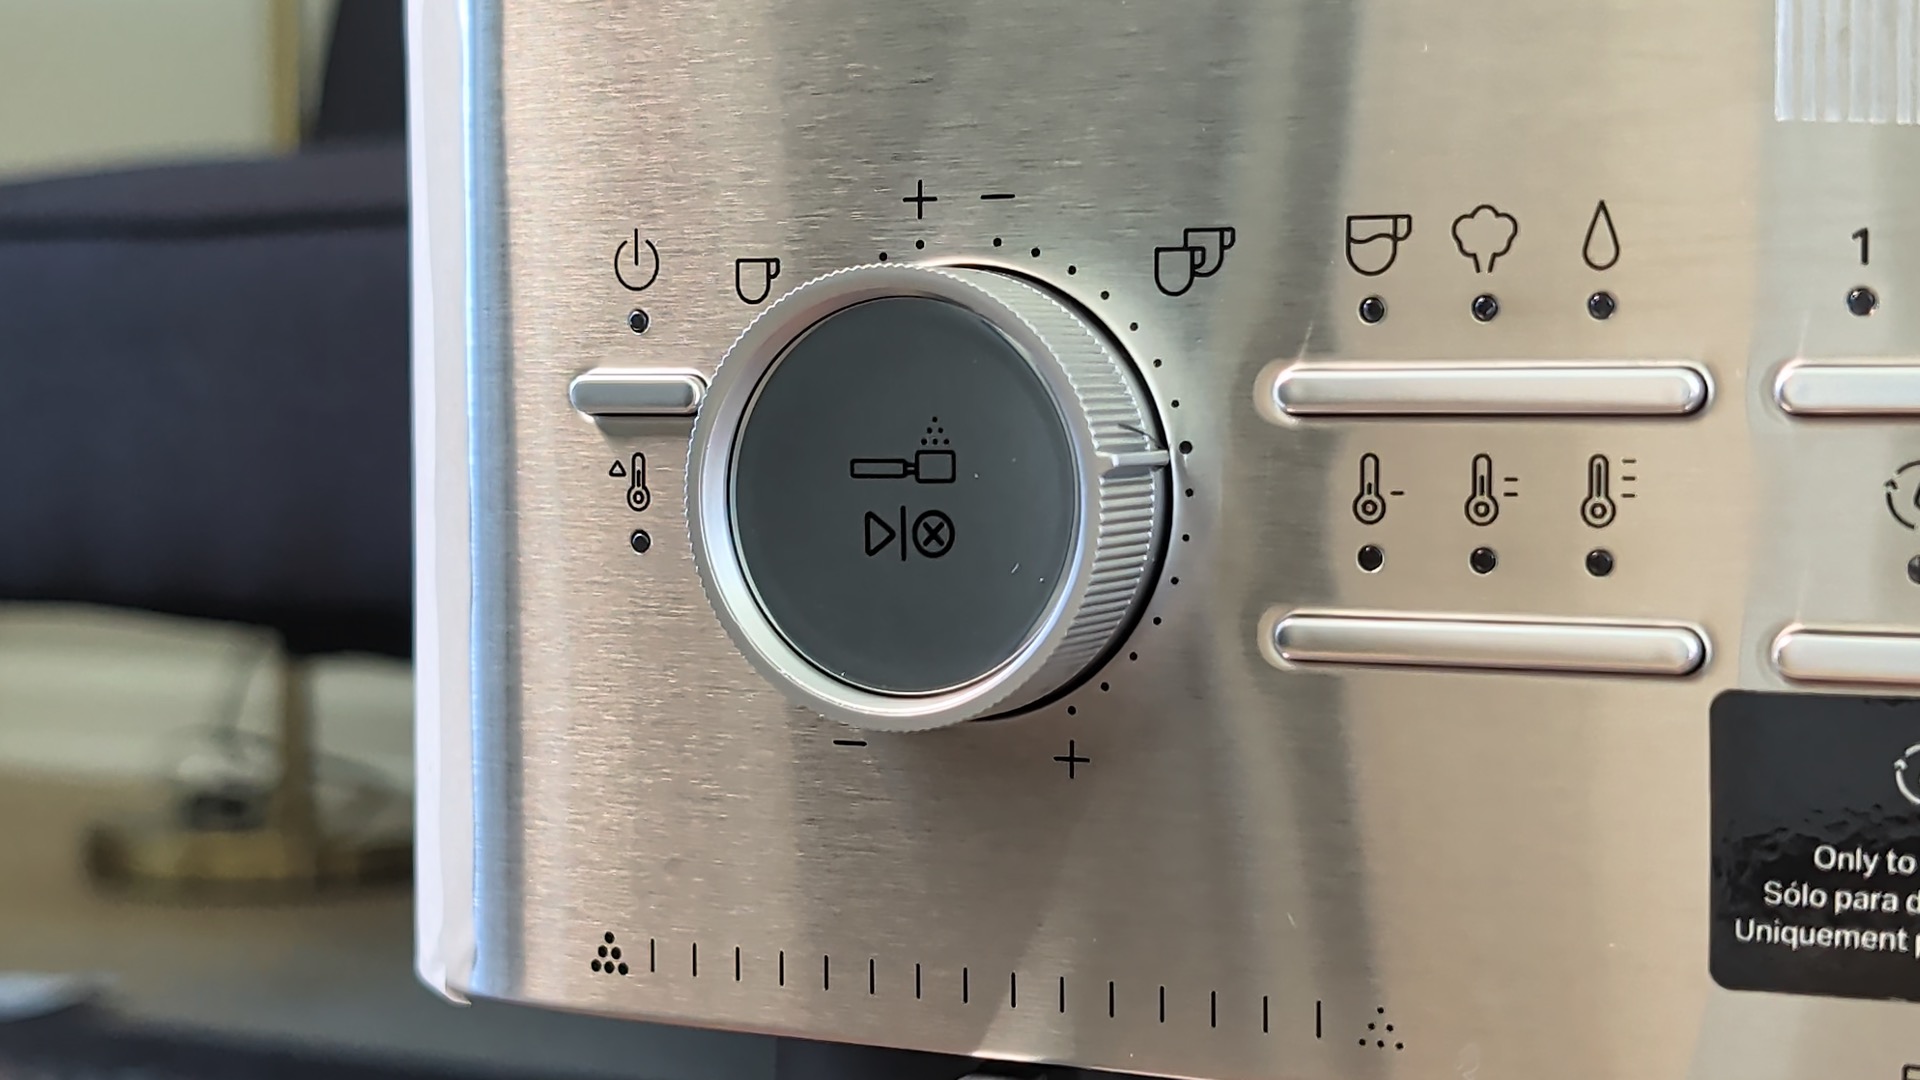
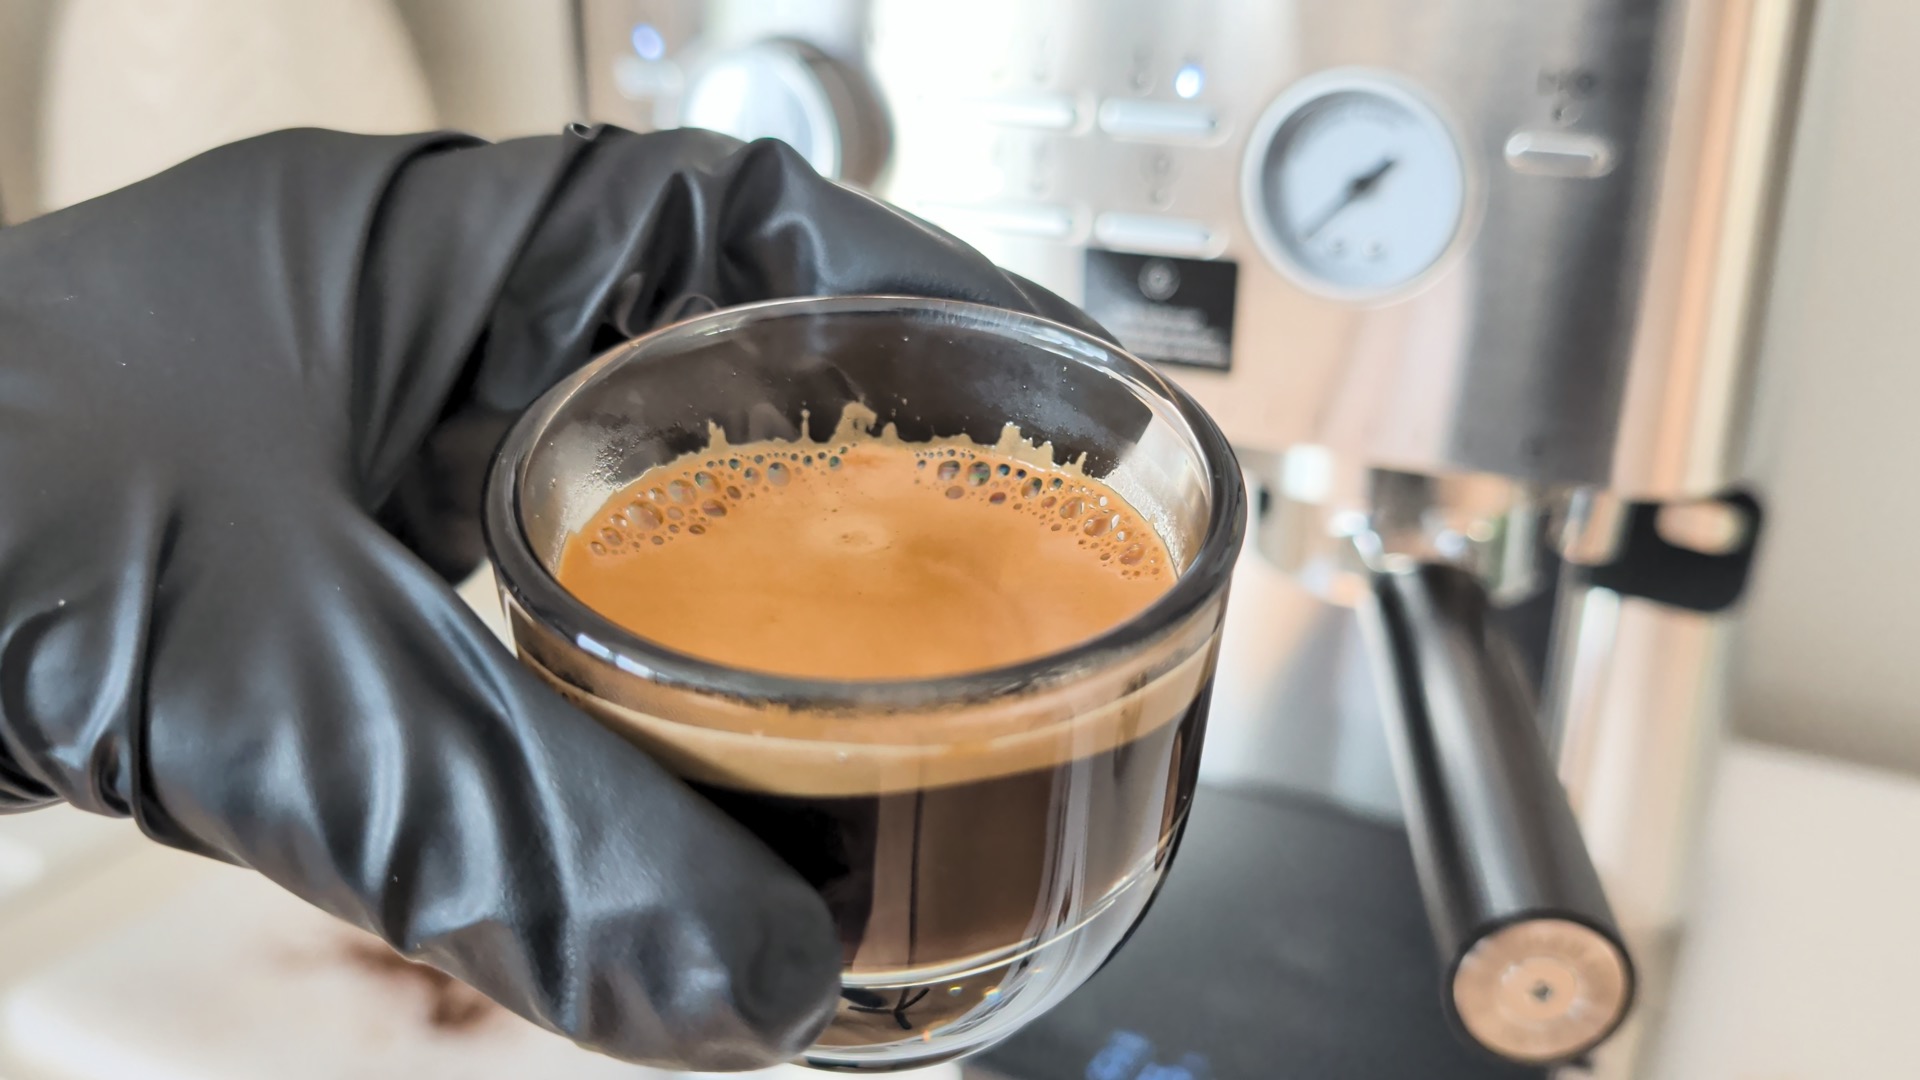
This resulted in a 38g pull in 30 seconds with an ideal pressure reading (gauge needle vertical). The taste was nearly perfect; I’ll likely continue a couple micro adjustments by going a bit finer but I’m happy overall with the brewing performance.
Frothing
I have absolutely no issues getting silky milk with this steam wand either. It seems very similar to the Breville Bambino wand, but a bit weaker. A common misconception is needing a powerful steam wand for amazing milk, but it’s totally possible with these lower or mid-range machines. With everything, it takes a bit of practice. In this case, it’s fine-tuning the amount of initial air infusion based on the milk type.
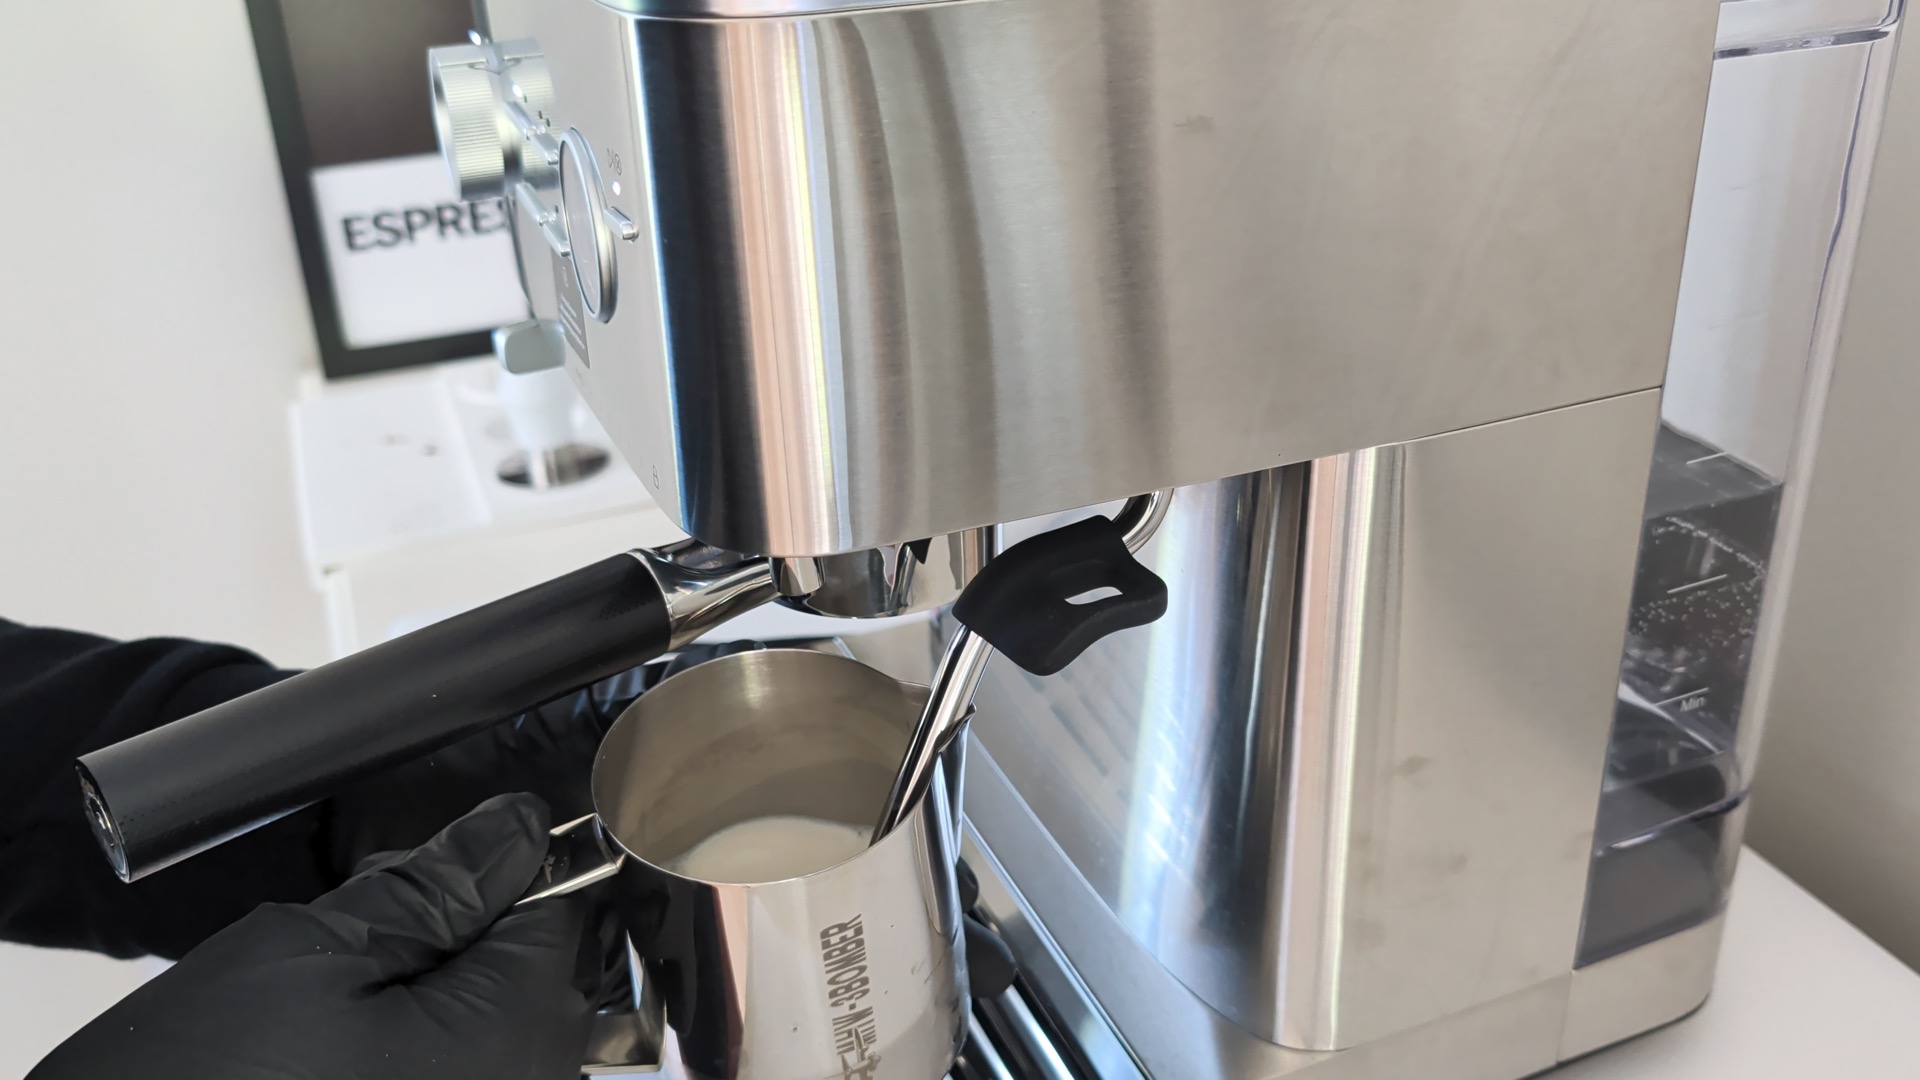
Even on my first attempt with oat milk, I infused a bit too much air at the start but the final result was still very solid - a paint-like consistency albeit with a few too many bigger air bubbles.
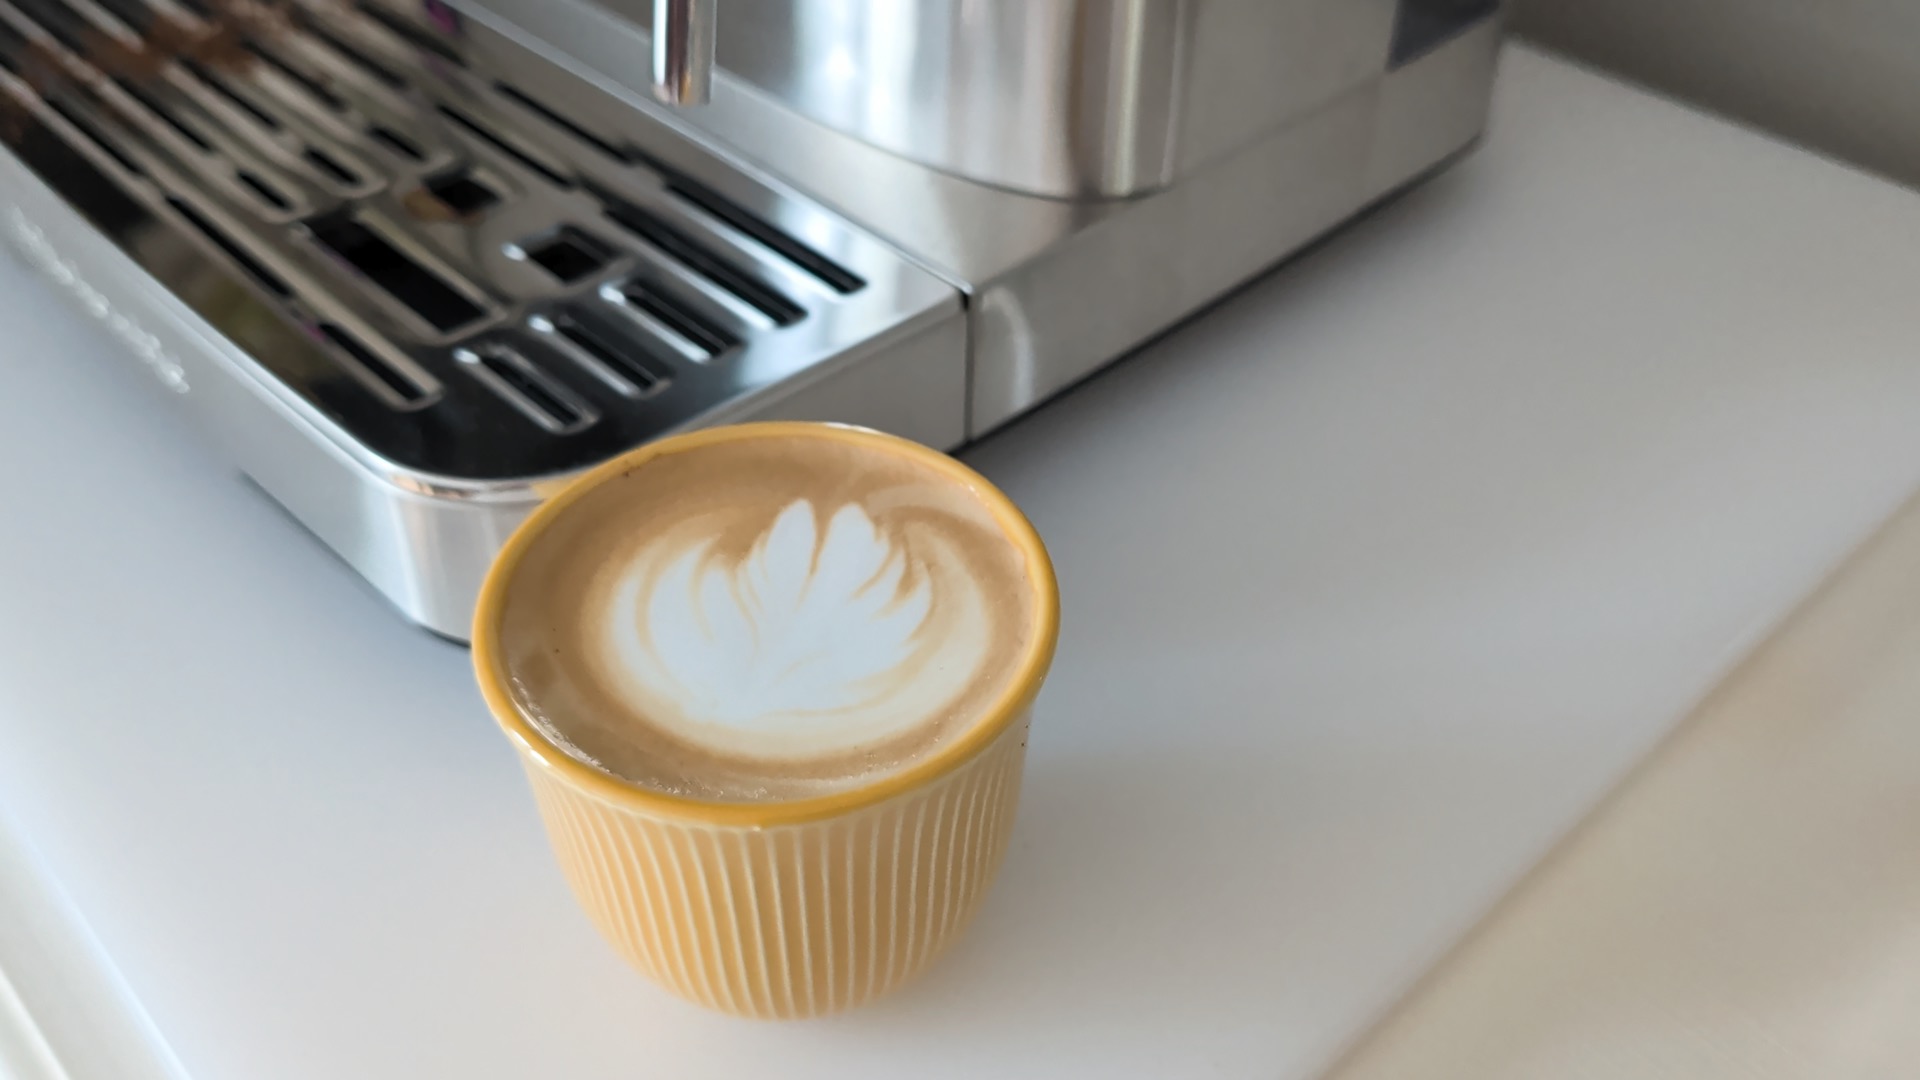
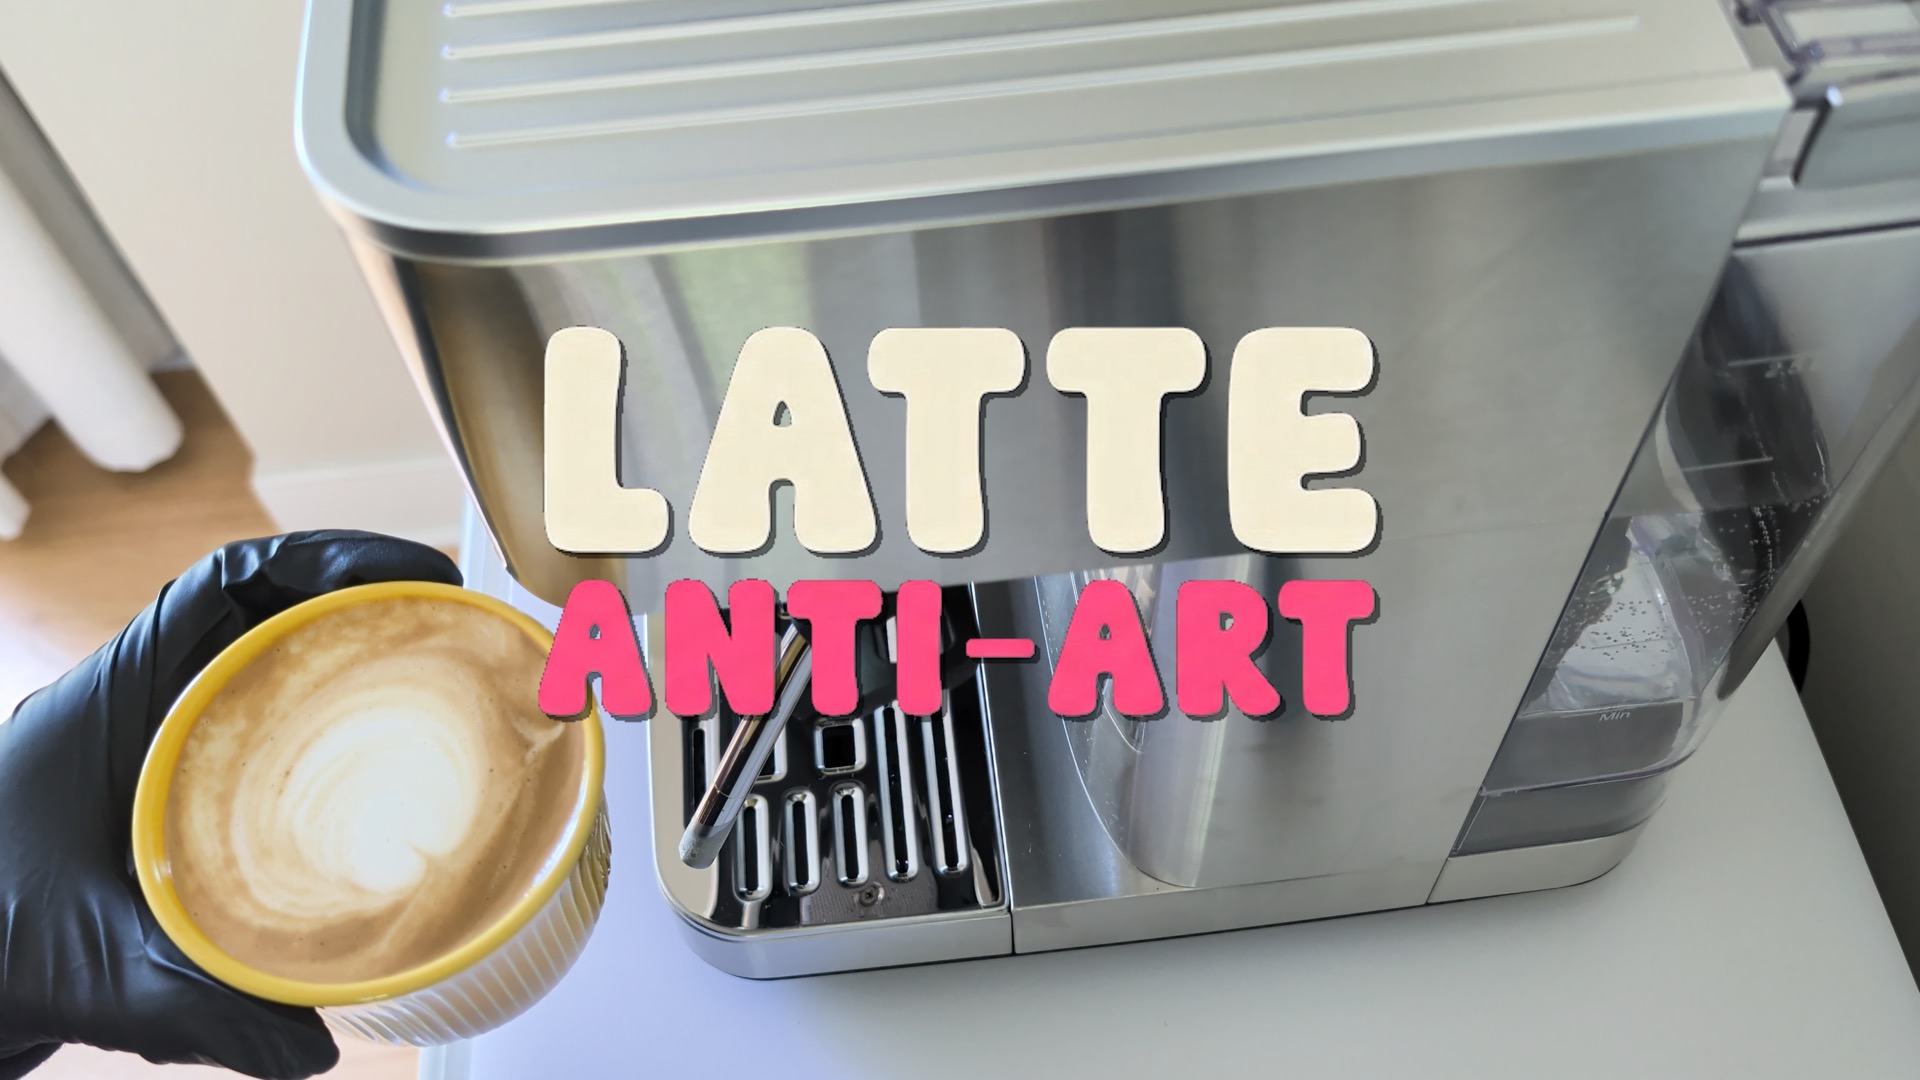
My next two attempts came out great, and as you can see… yes, latte art is possible. But with that said, I’m going to commit to a trend of latte anti-art. If you’re already into this hobby, or if you’ve just started research, your social feeds are likely filled with 95% latte art videos. It takes the hobby away from what it should be focused on: taste. So many beginners in this hobby focus too much on making latte art after getting their first machine. Instead of only focusing on great tasting espresso, it adds an element of frustration when they can’t craft a groggy-eyed swan at 6am.
Technical Specifications
| Brand | KitchenAid |
|---|---|
| Model | Semi Automatic Espresso Machine |
| Adjustment | Stepped |
| Settings | 15 external + 8 internal |
| Footprint | 11" x 13.1" x 15.4" |
| Weight | 23.5 Pounds |
| Capacity | 250 g |
| Burr size | 30 mm |
Frequently Asked Questions
How does the KitchenAid Semi-Automatic performance stack up to the Breville Barista Express?+
The Breville Barista Express has the edge on adjustability and control. It has precise one-degree temperature increments to the KitchenAid’s 3 options, adjustable pre-infusion time, and a couple of extra grind settings. The KitchenAid, on the other hand, prioritizes ease-of-use, and (for those with open-plan living situations) a wonderfully quiet grinder.
Does the KitchenAid KES6551 have enough grind settings to dial in espresso properly?+
The KES6551 offers 15 external grind settings plus 8 internal microadjustments for 120 possible settings in total. This should be adequate for most users who just want a decent espresso from their all-in-one, but users who want the precision of a stepless grinder may find the stepped adjustments less precise. Starting around setting 5–7 and adjusting from there is the most commonly recommended approach, however setting 11 is what worked for my beans.
Who is the KitchenAid Semi-Automatic Espresso Machine for?+
This is best for users who value ease-of-use over precision and space saving by not having a secondary grinder. If you can’t be bothered to set an exact temperature, pre-infusion time, or super-precise grind, then this machine will be right up your alley. Two other pluses are the easy-change hopper and surprisingly quiet grinder. If you’ve already got a KitchenAid stand mixer on your countertop, a consistent kitchen aesthetic may also push the KES6551 over the line.